

About a month ago I took a couple of classes online from Alisa Burke. This inspired me to try watercolors again. Watercolor artwork is something I admire, but I struggle with managing the colors, the water and all of that to make something recognizable. These watercolor flower cards are my try at working with watercolors. I am pretty sure anyone can make them and here is the process.
Materials:
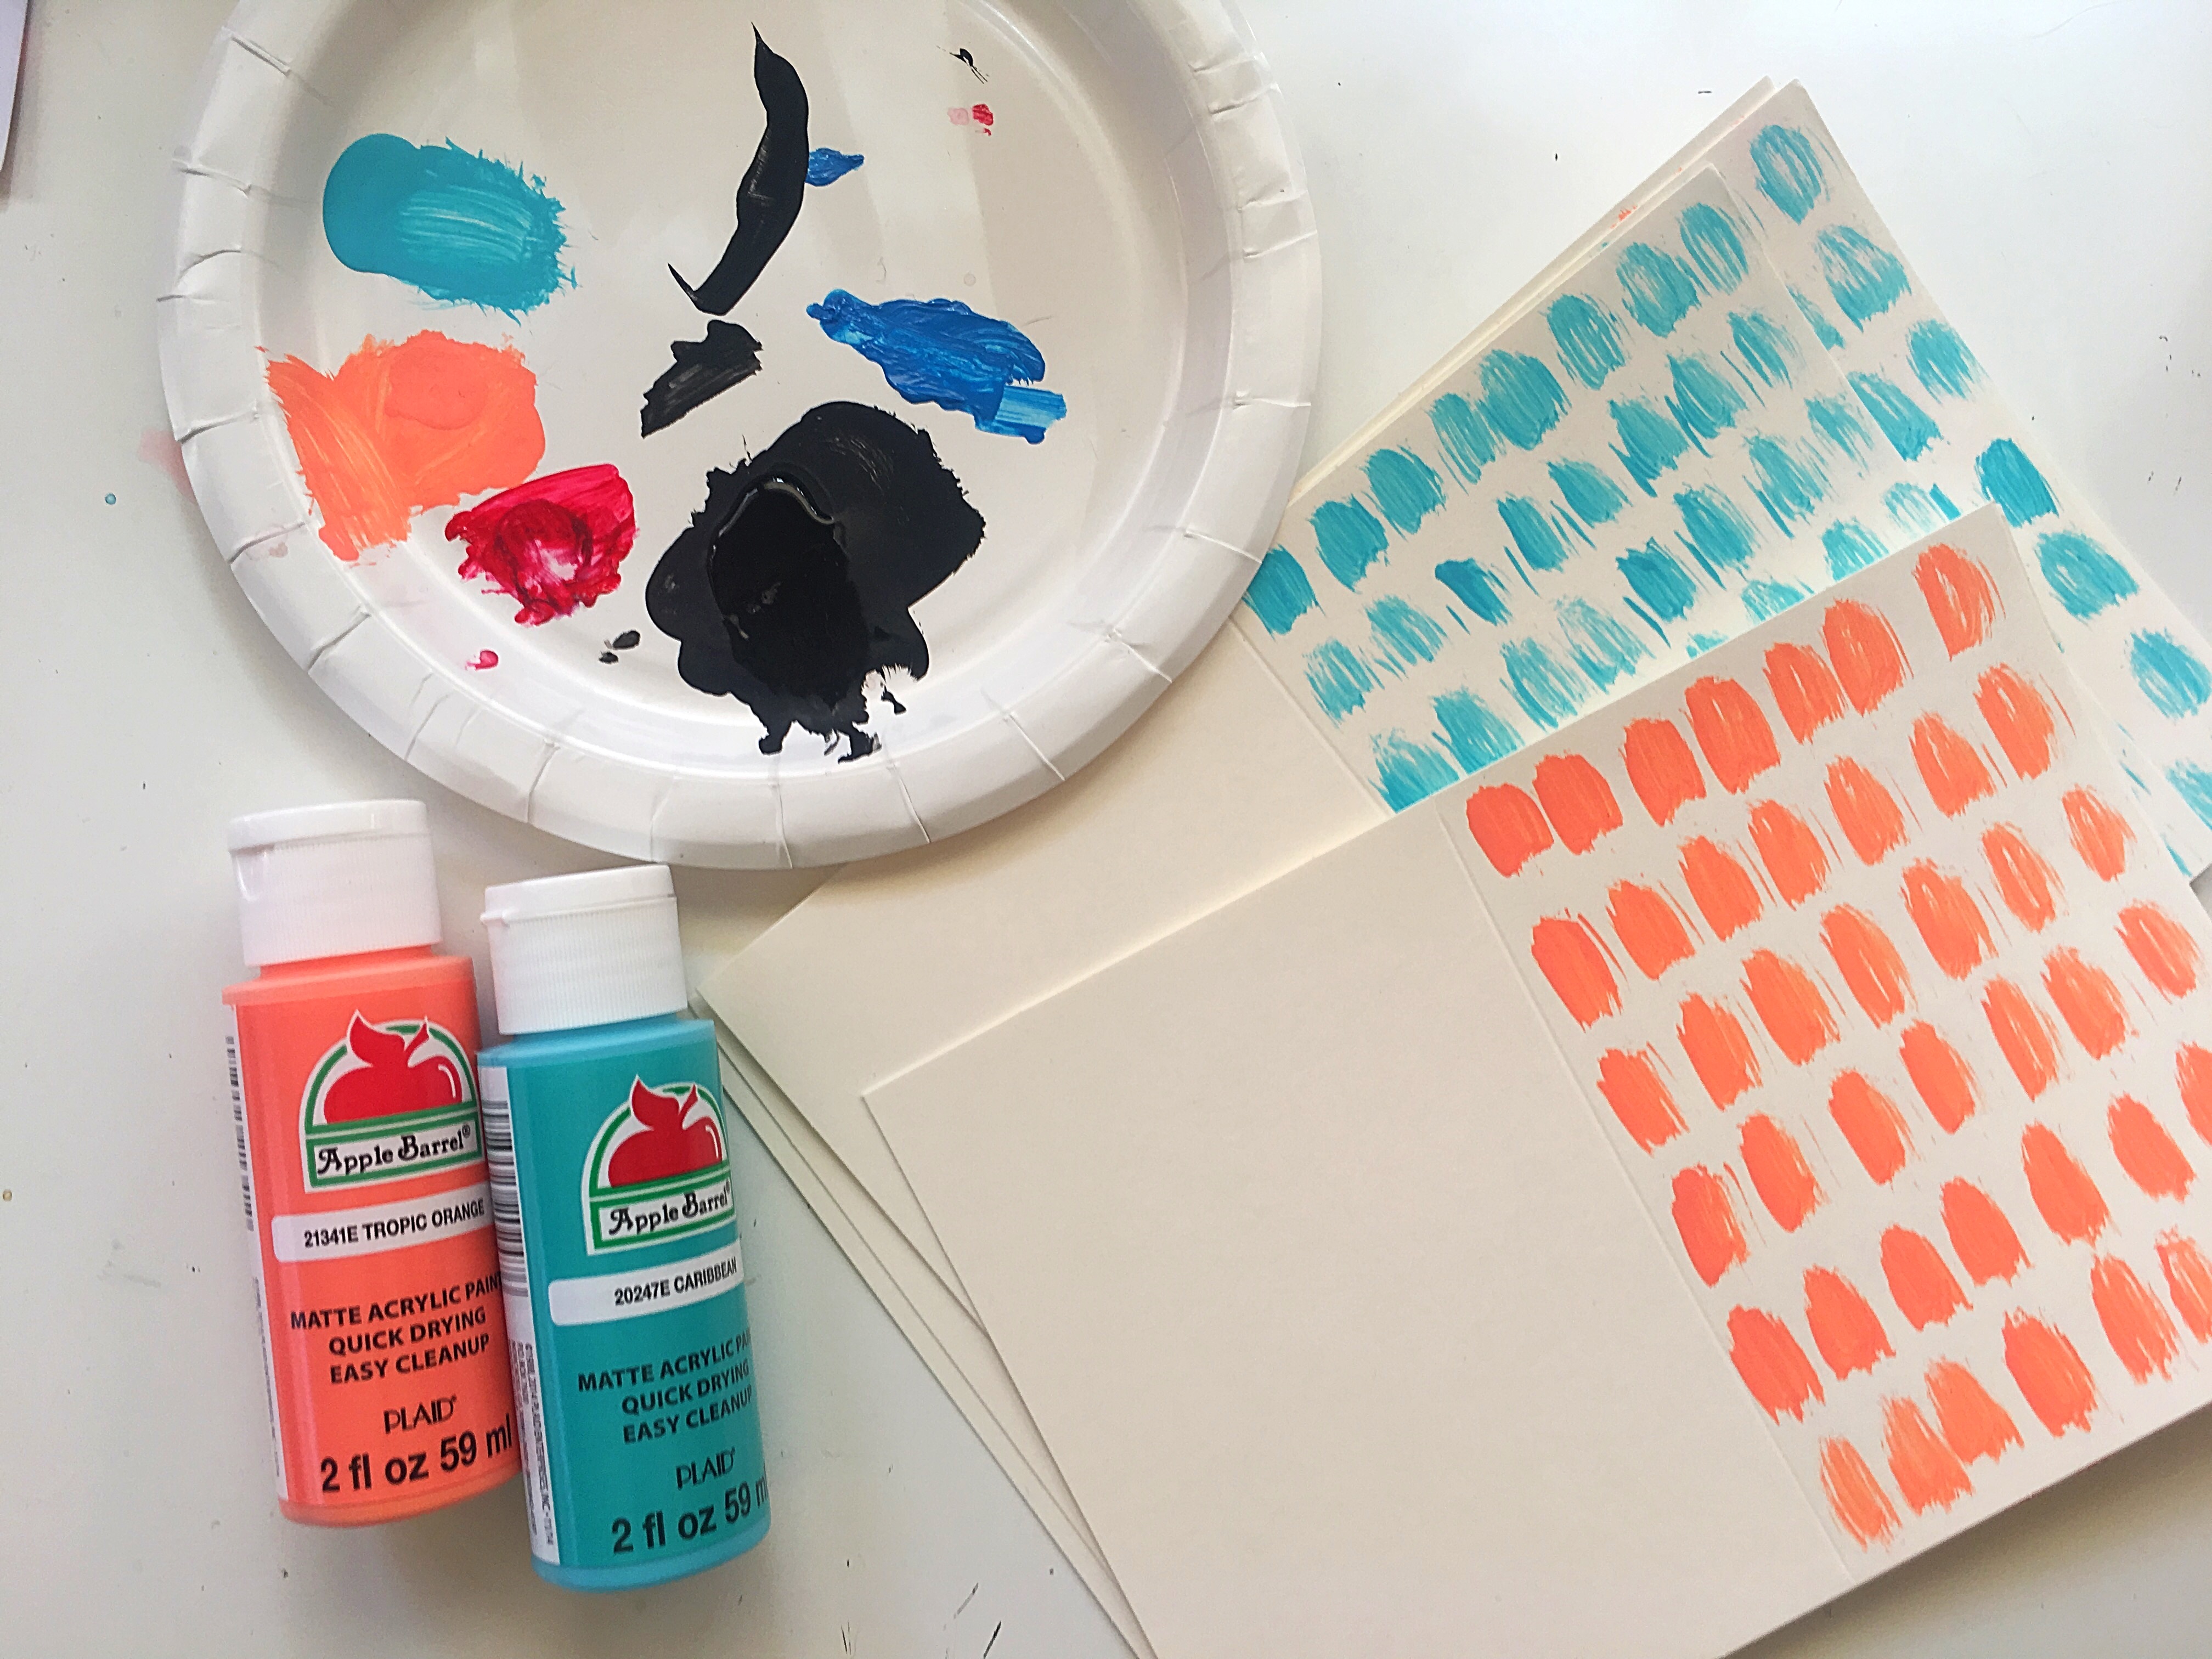
Watercolors (any that you have. I used Color Burst by Ken Oliver Crafts because I like the vibrant colors)
Acryclic Paint (black and two other colors of your choice. I used Caribbean and Tropic Orange by Apple Barrel).
Blank Cards
Watercolor paper
Brushes (any that you have on hand)
Scissors
Sewing machine
Technique:
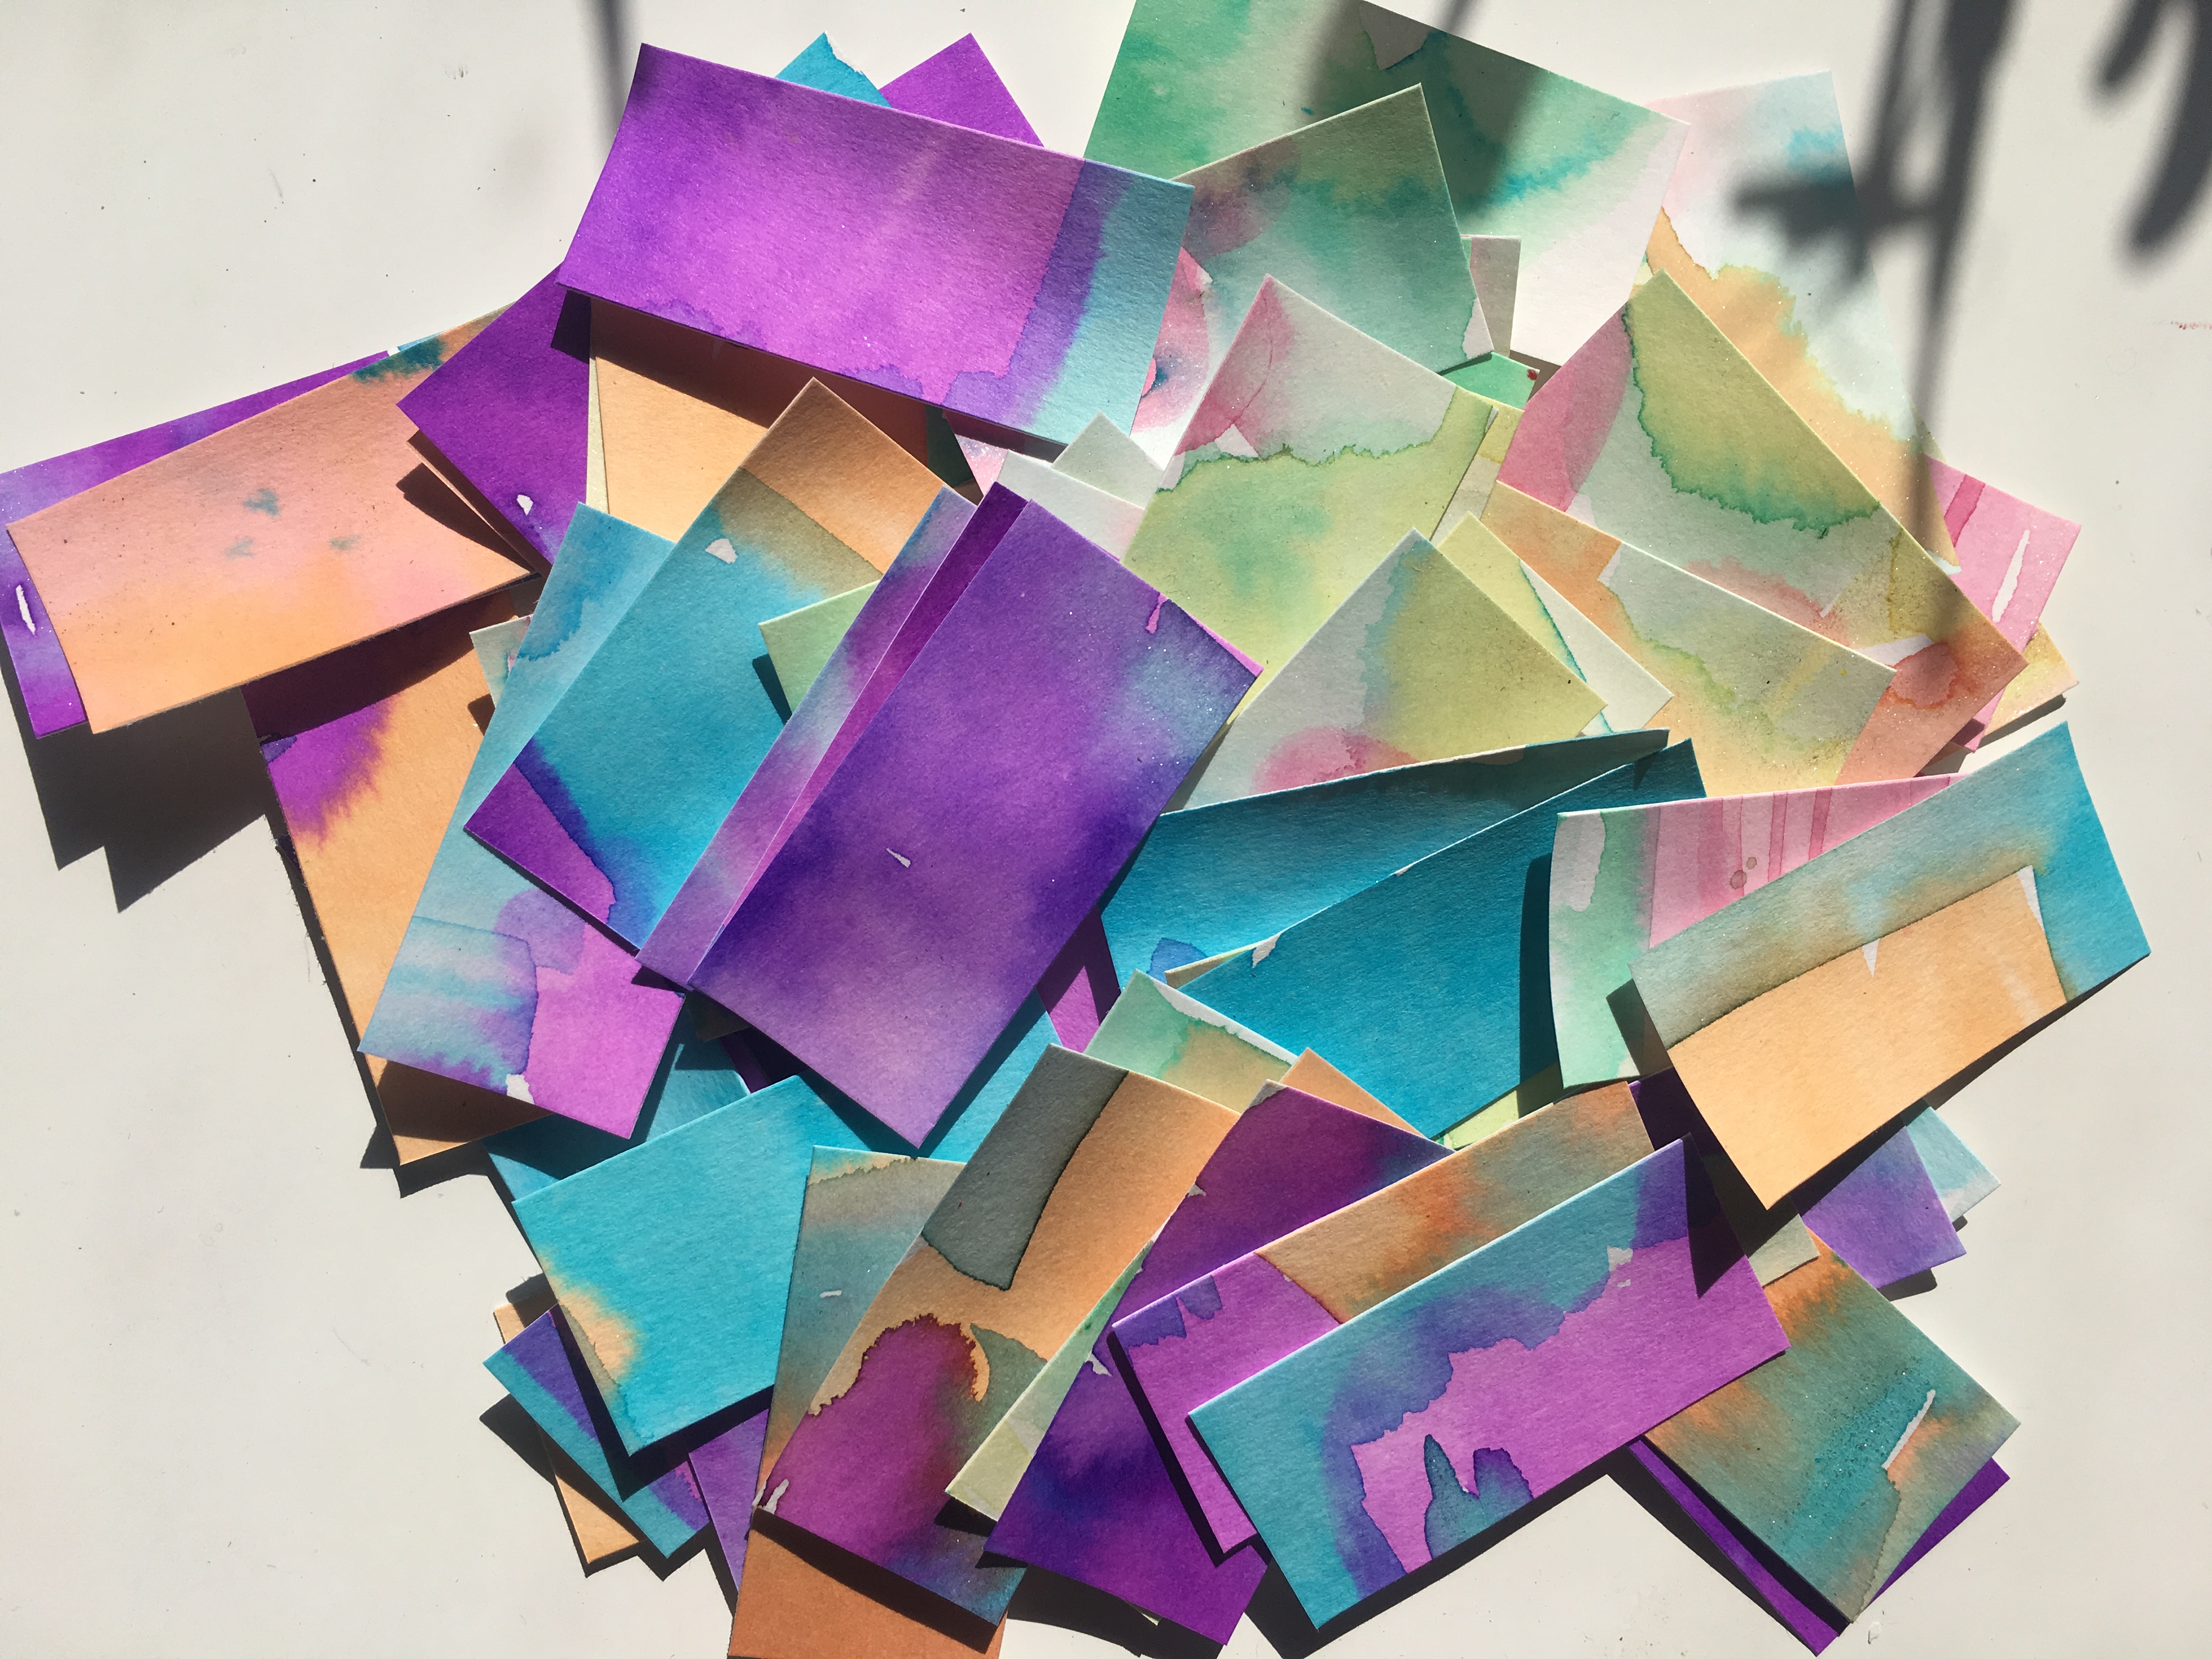
Create a watercolor wash. This is simply spreading colors all over the place. Limit yourself to three so you don’t create mud.
Cut the paper into strips (1″-1.5″). Cut the strips into 2″ length. From these 1″x 2″ strips you will cut your petals.

Then use the black acrylic paint to paint around the edges of your petals. The black will make the color of your petals really pop.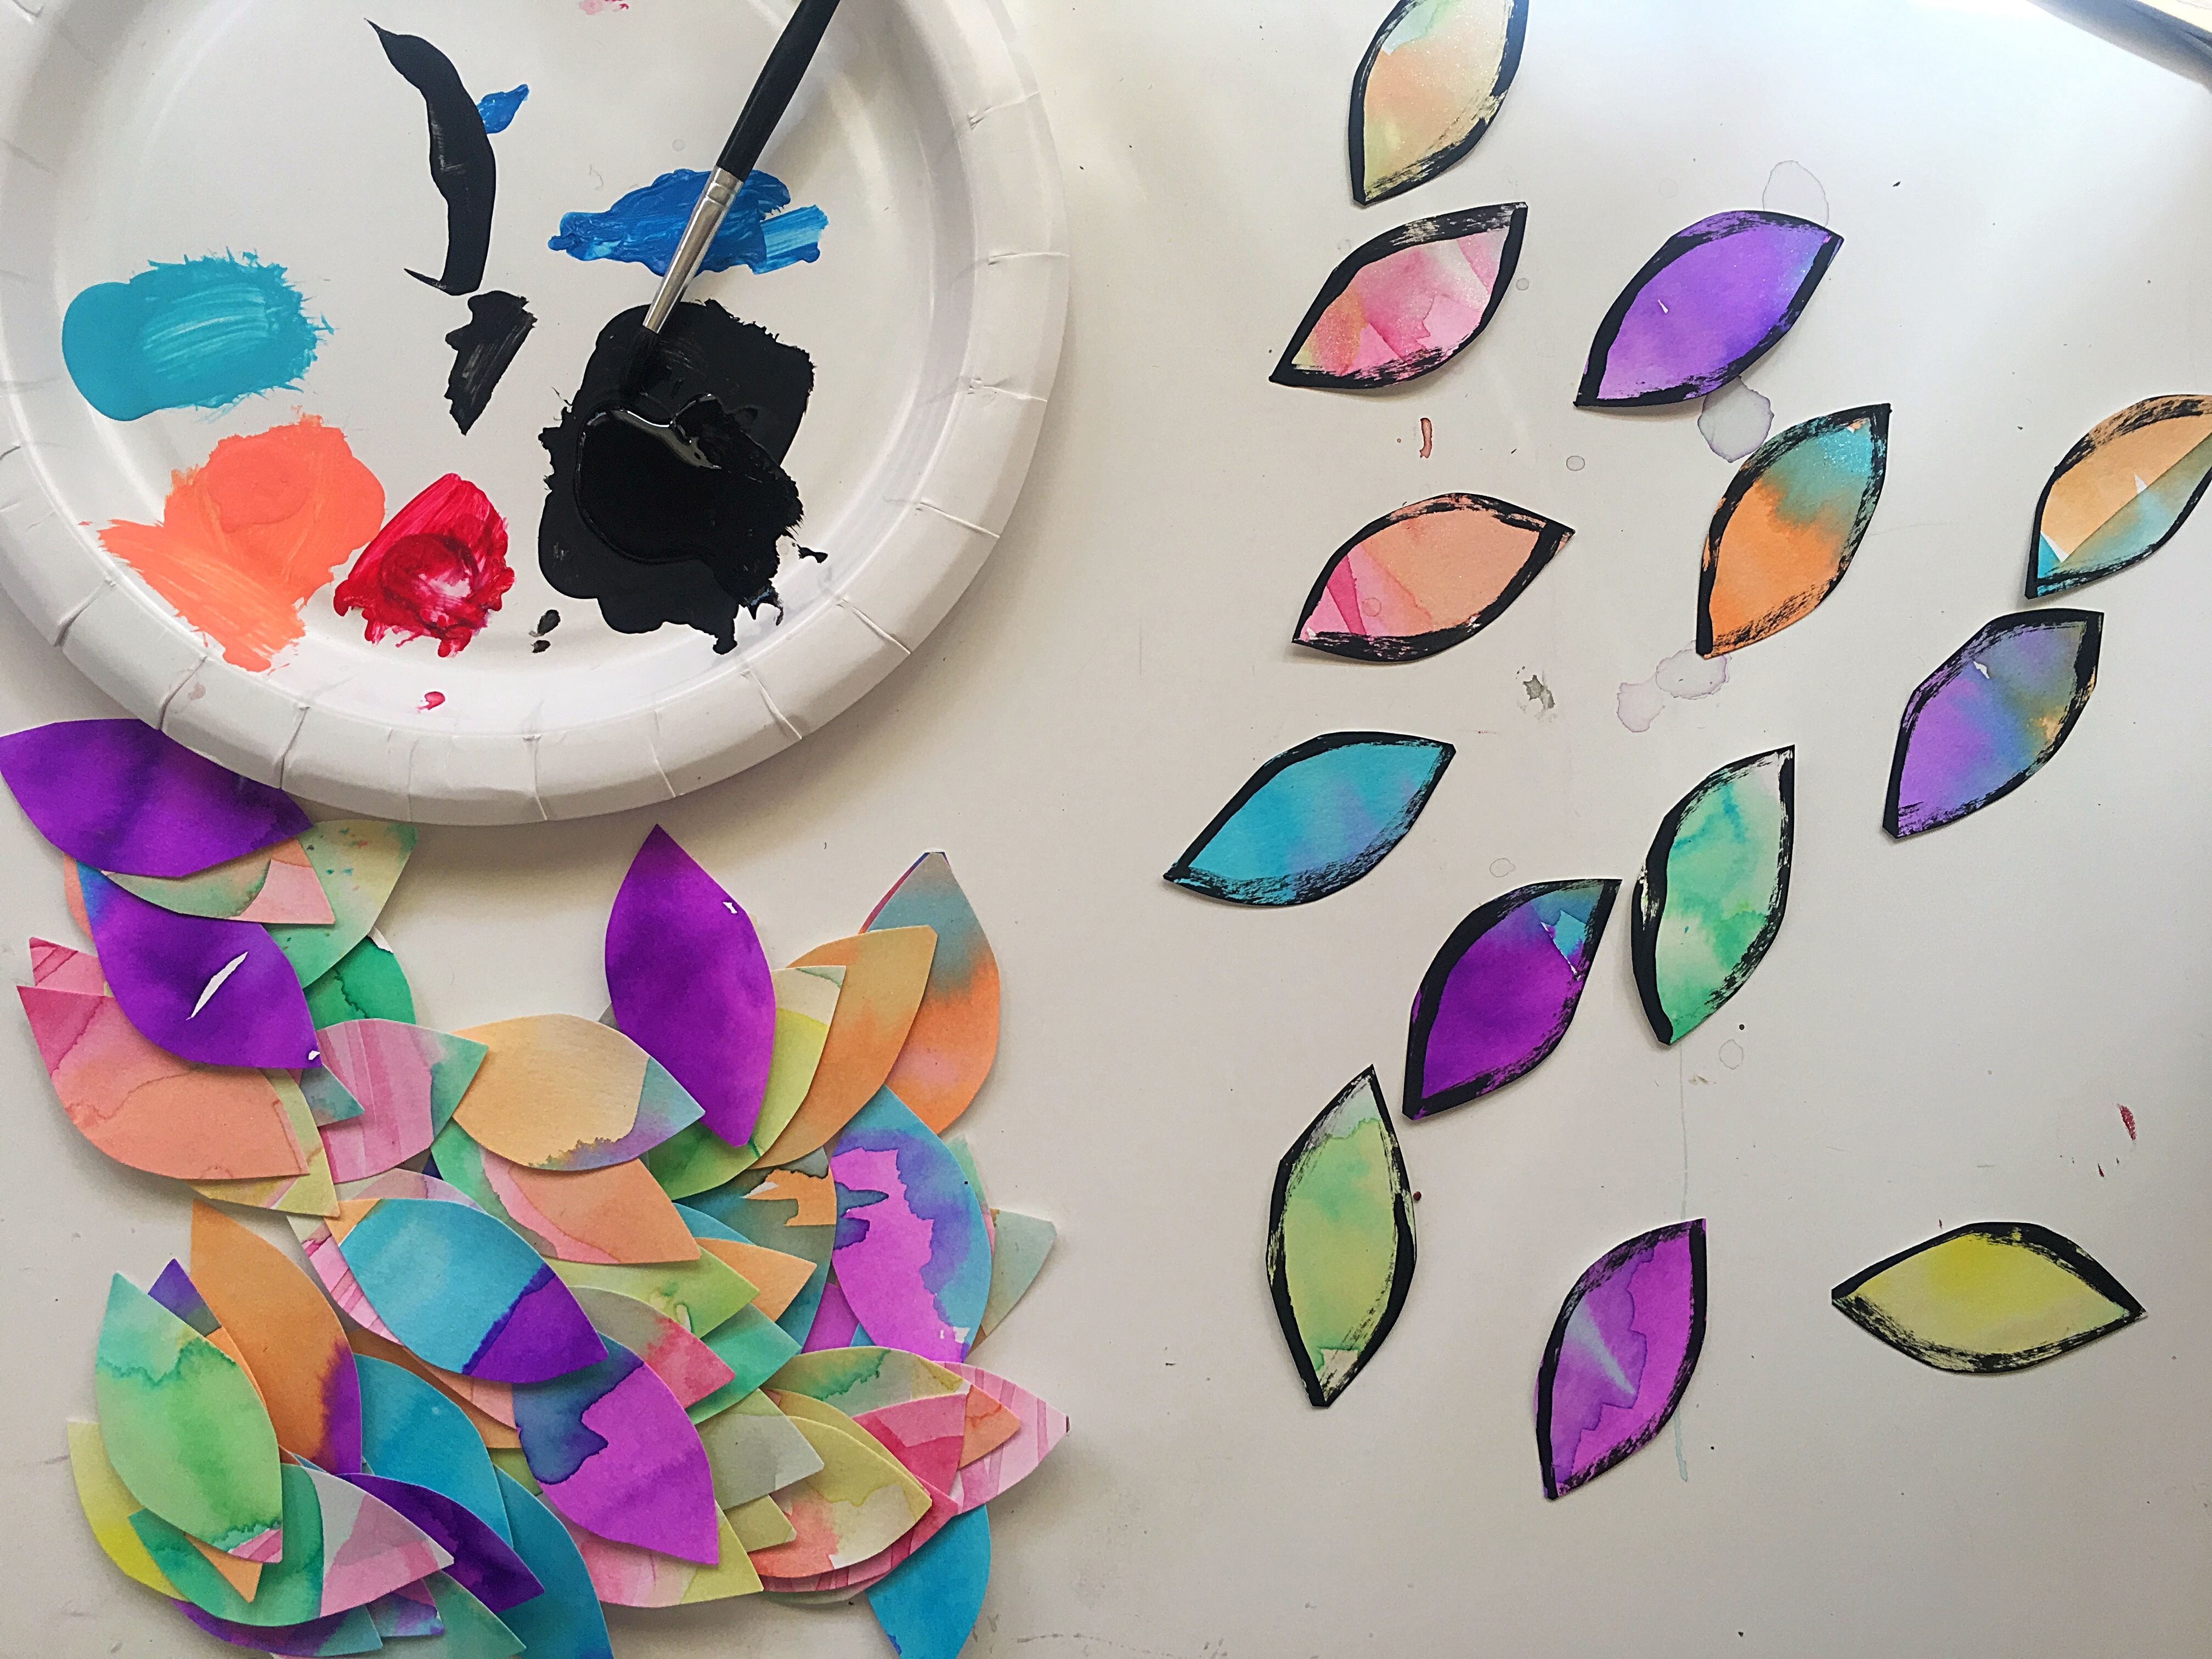
Make a lot of petals.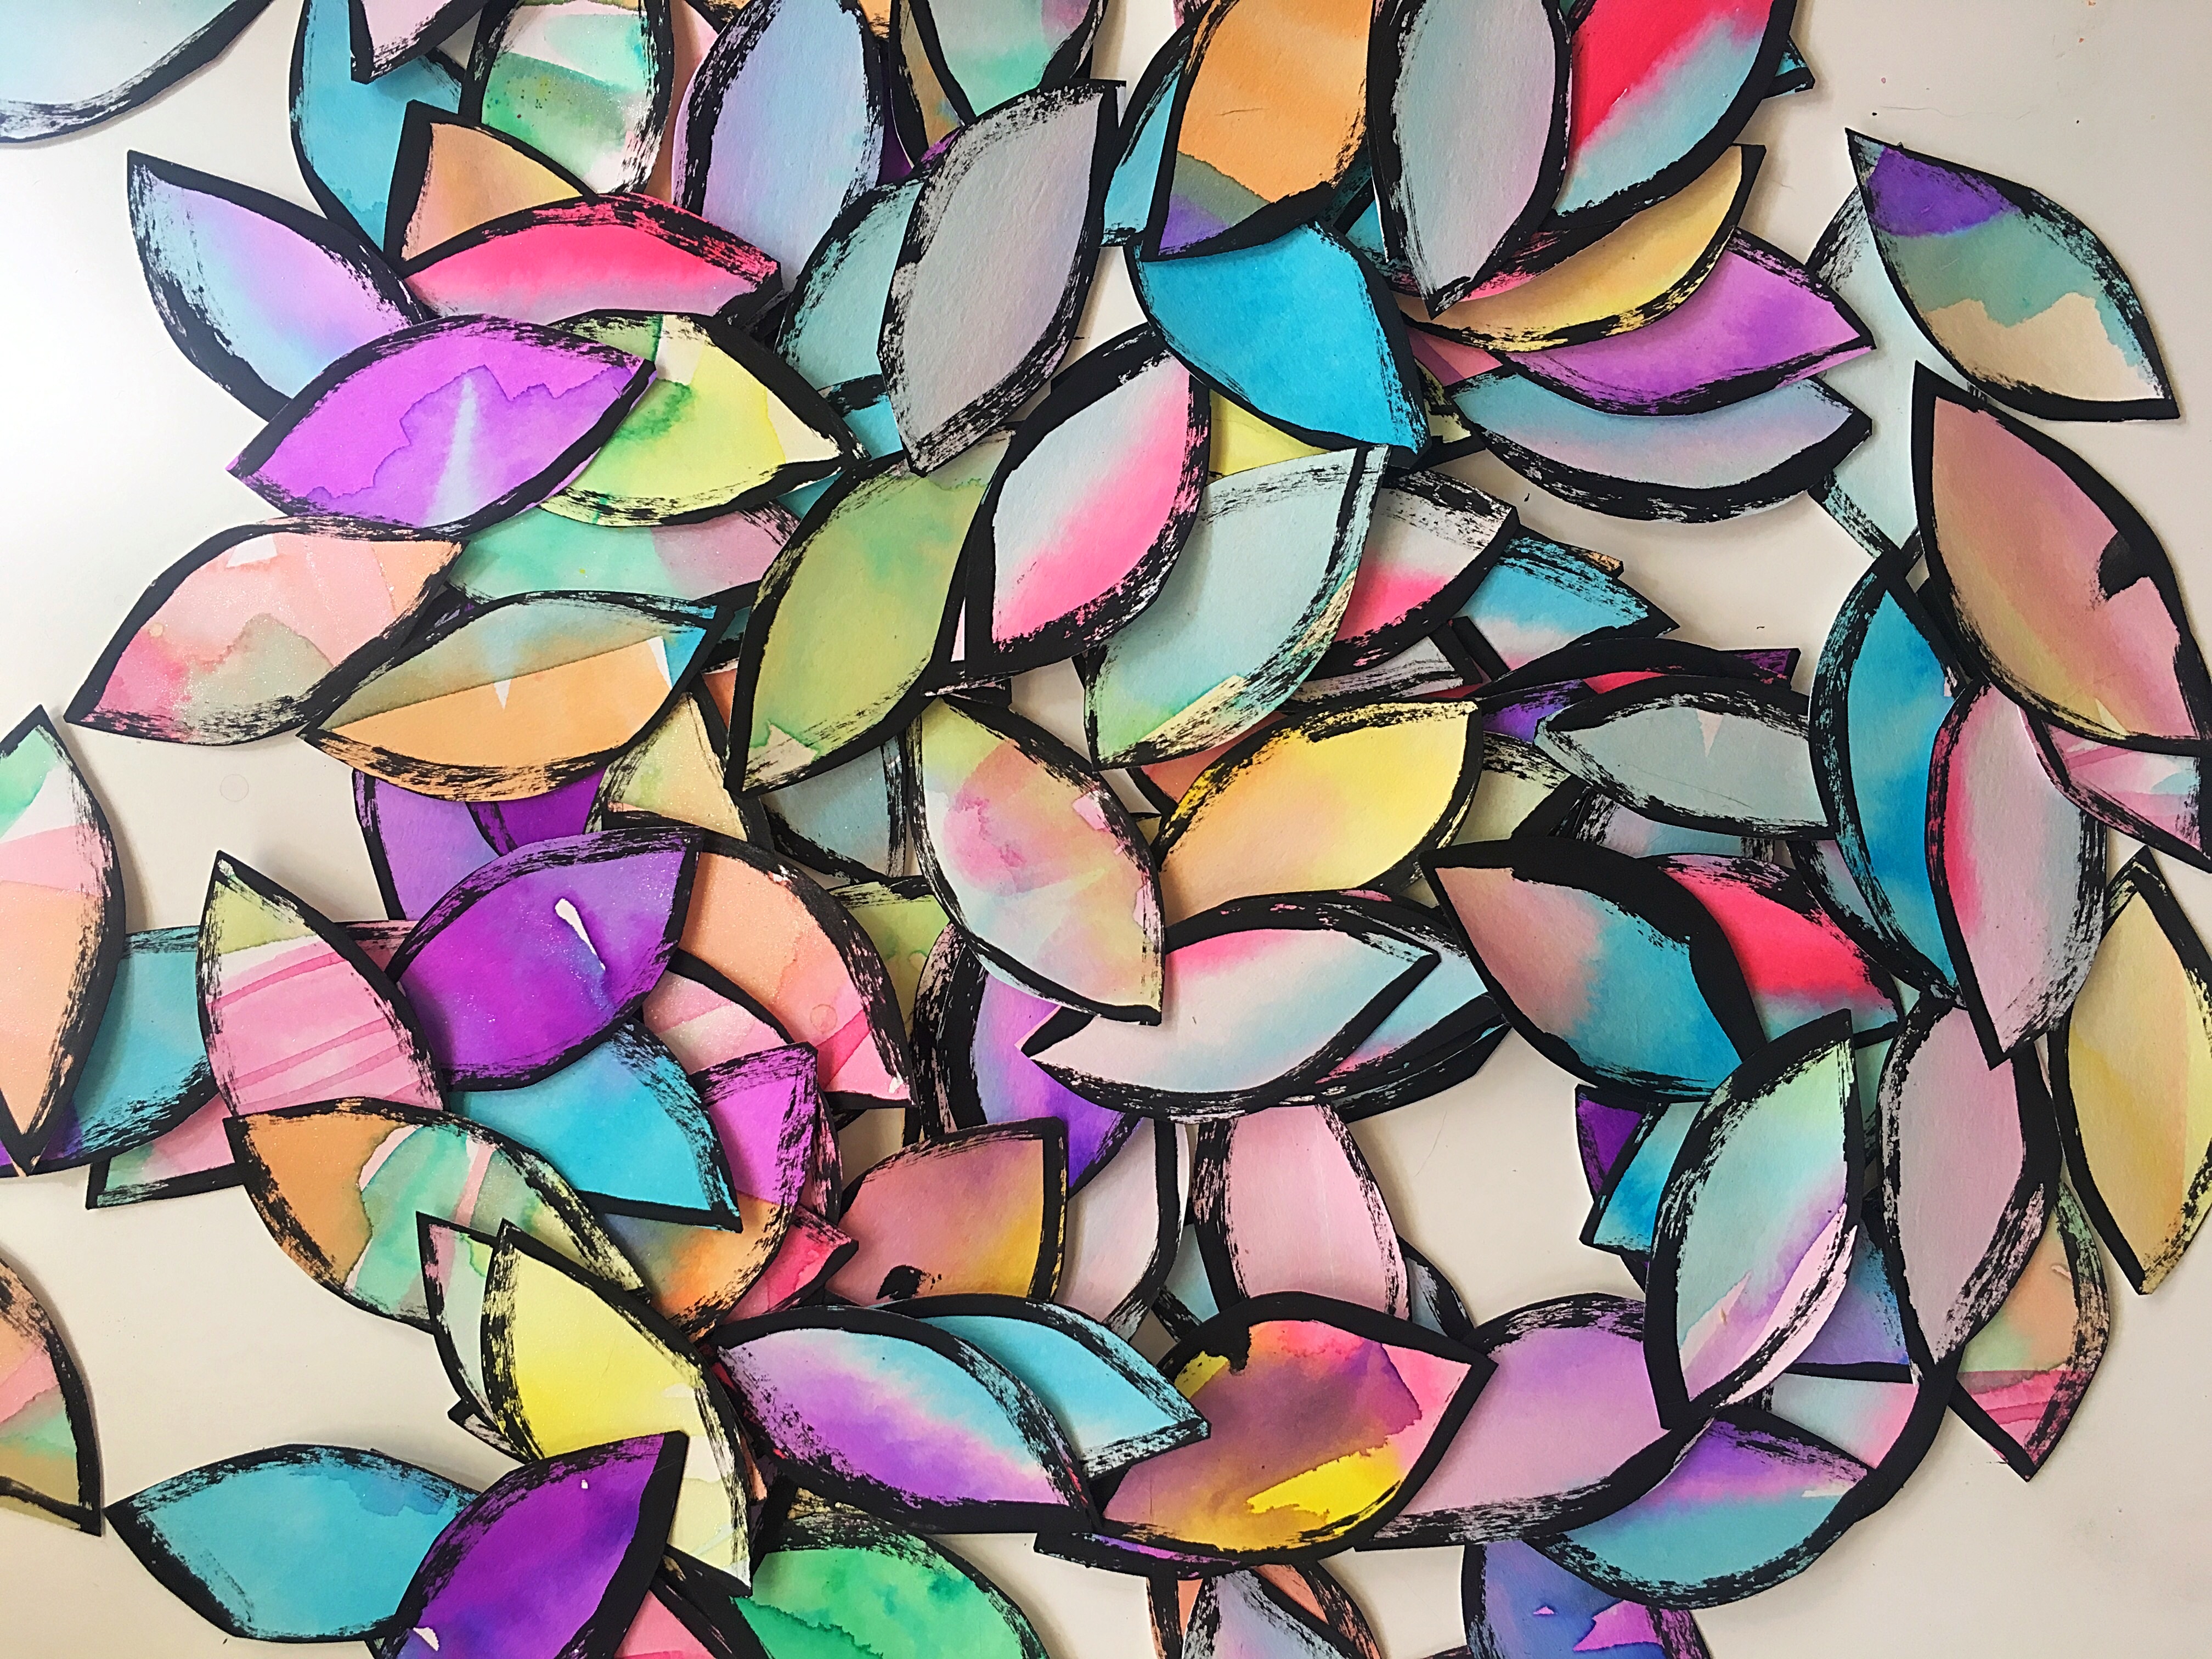
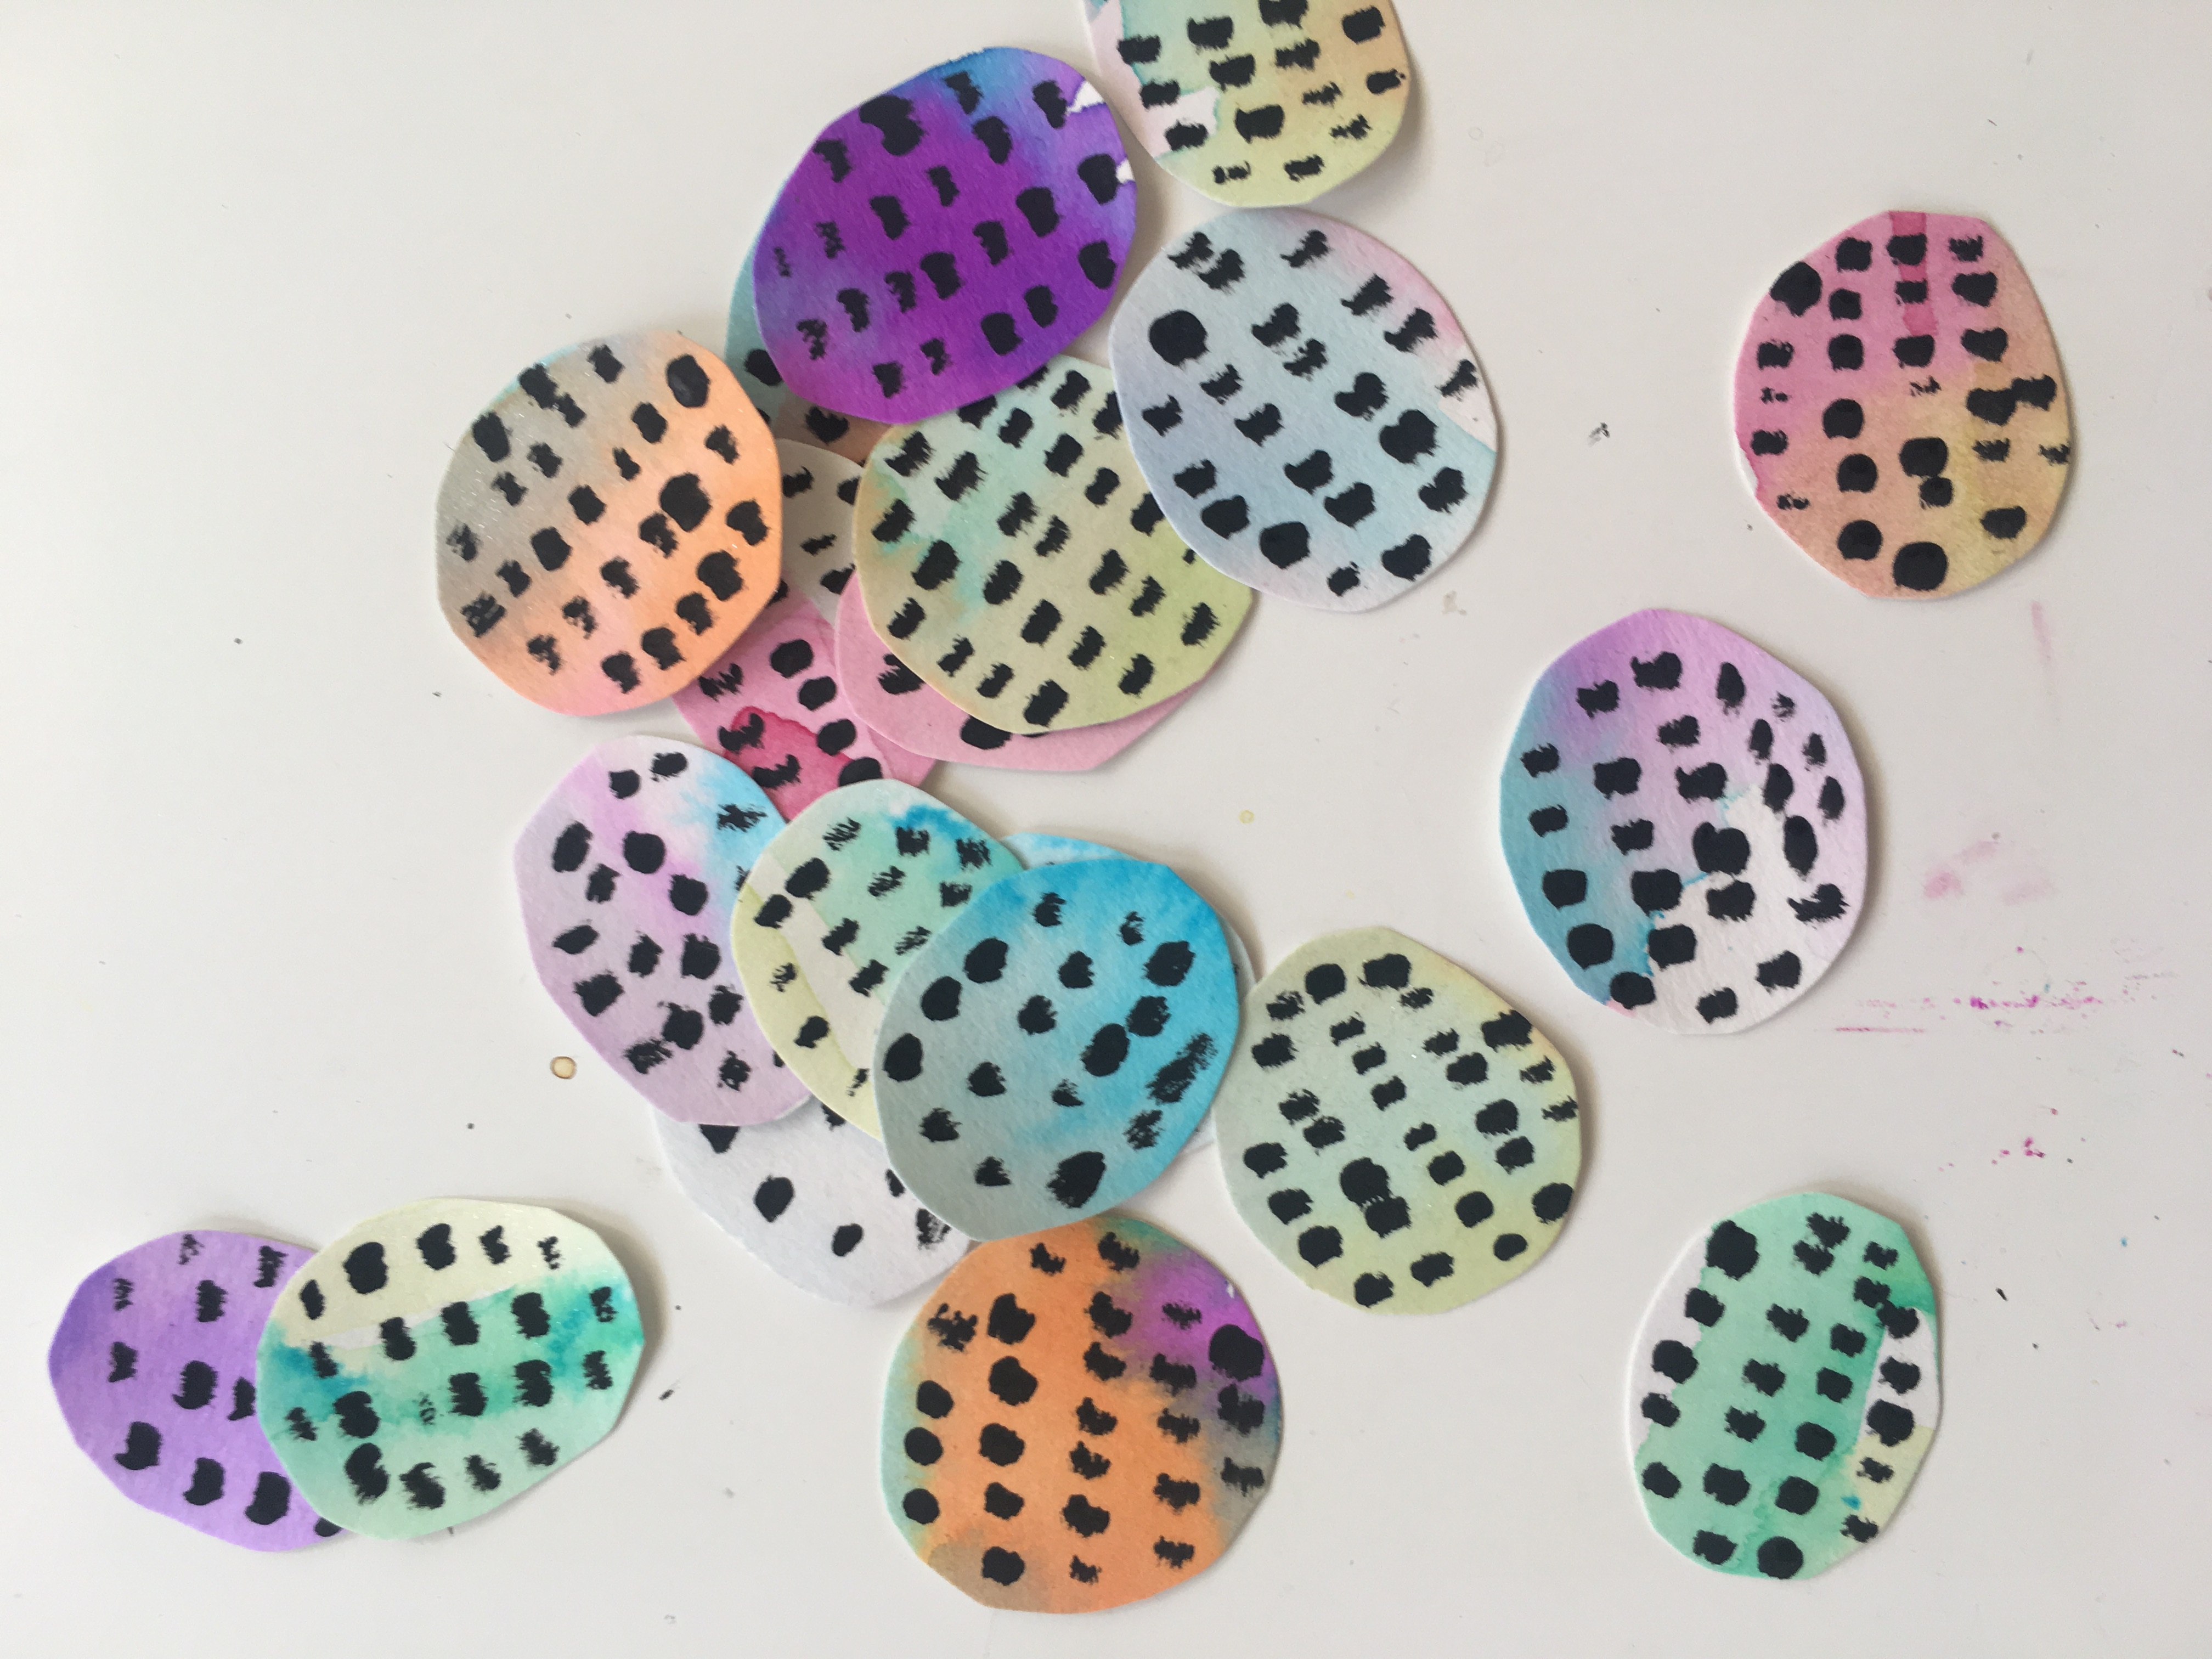
From the left over strips cut circle shapes. This will be the center of the flower. Add some black dots with the black acrylic paint.
 Using the other two acrylic paint choices paint the front of your blank card with lines of short strokes.
And now time for the fun part. Assemble the petals into a flower on the front of your card. Since stitching on paper is one of my favorite things I stitched the center of the flower on my sewing machine.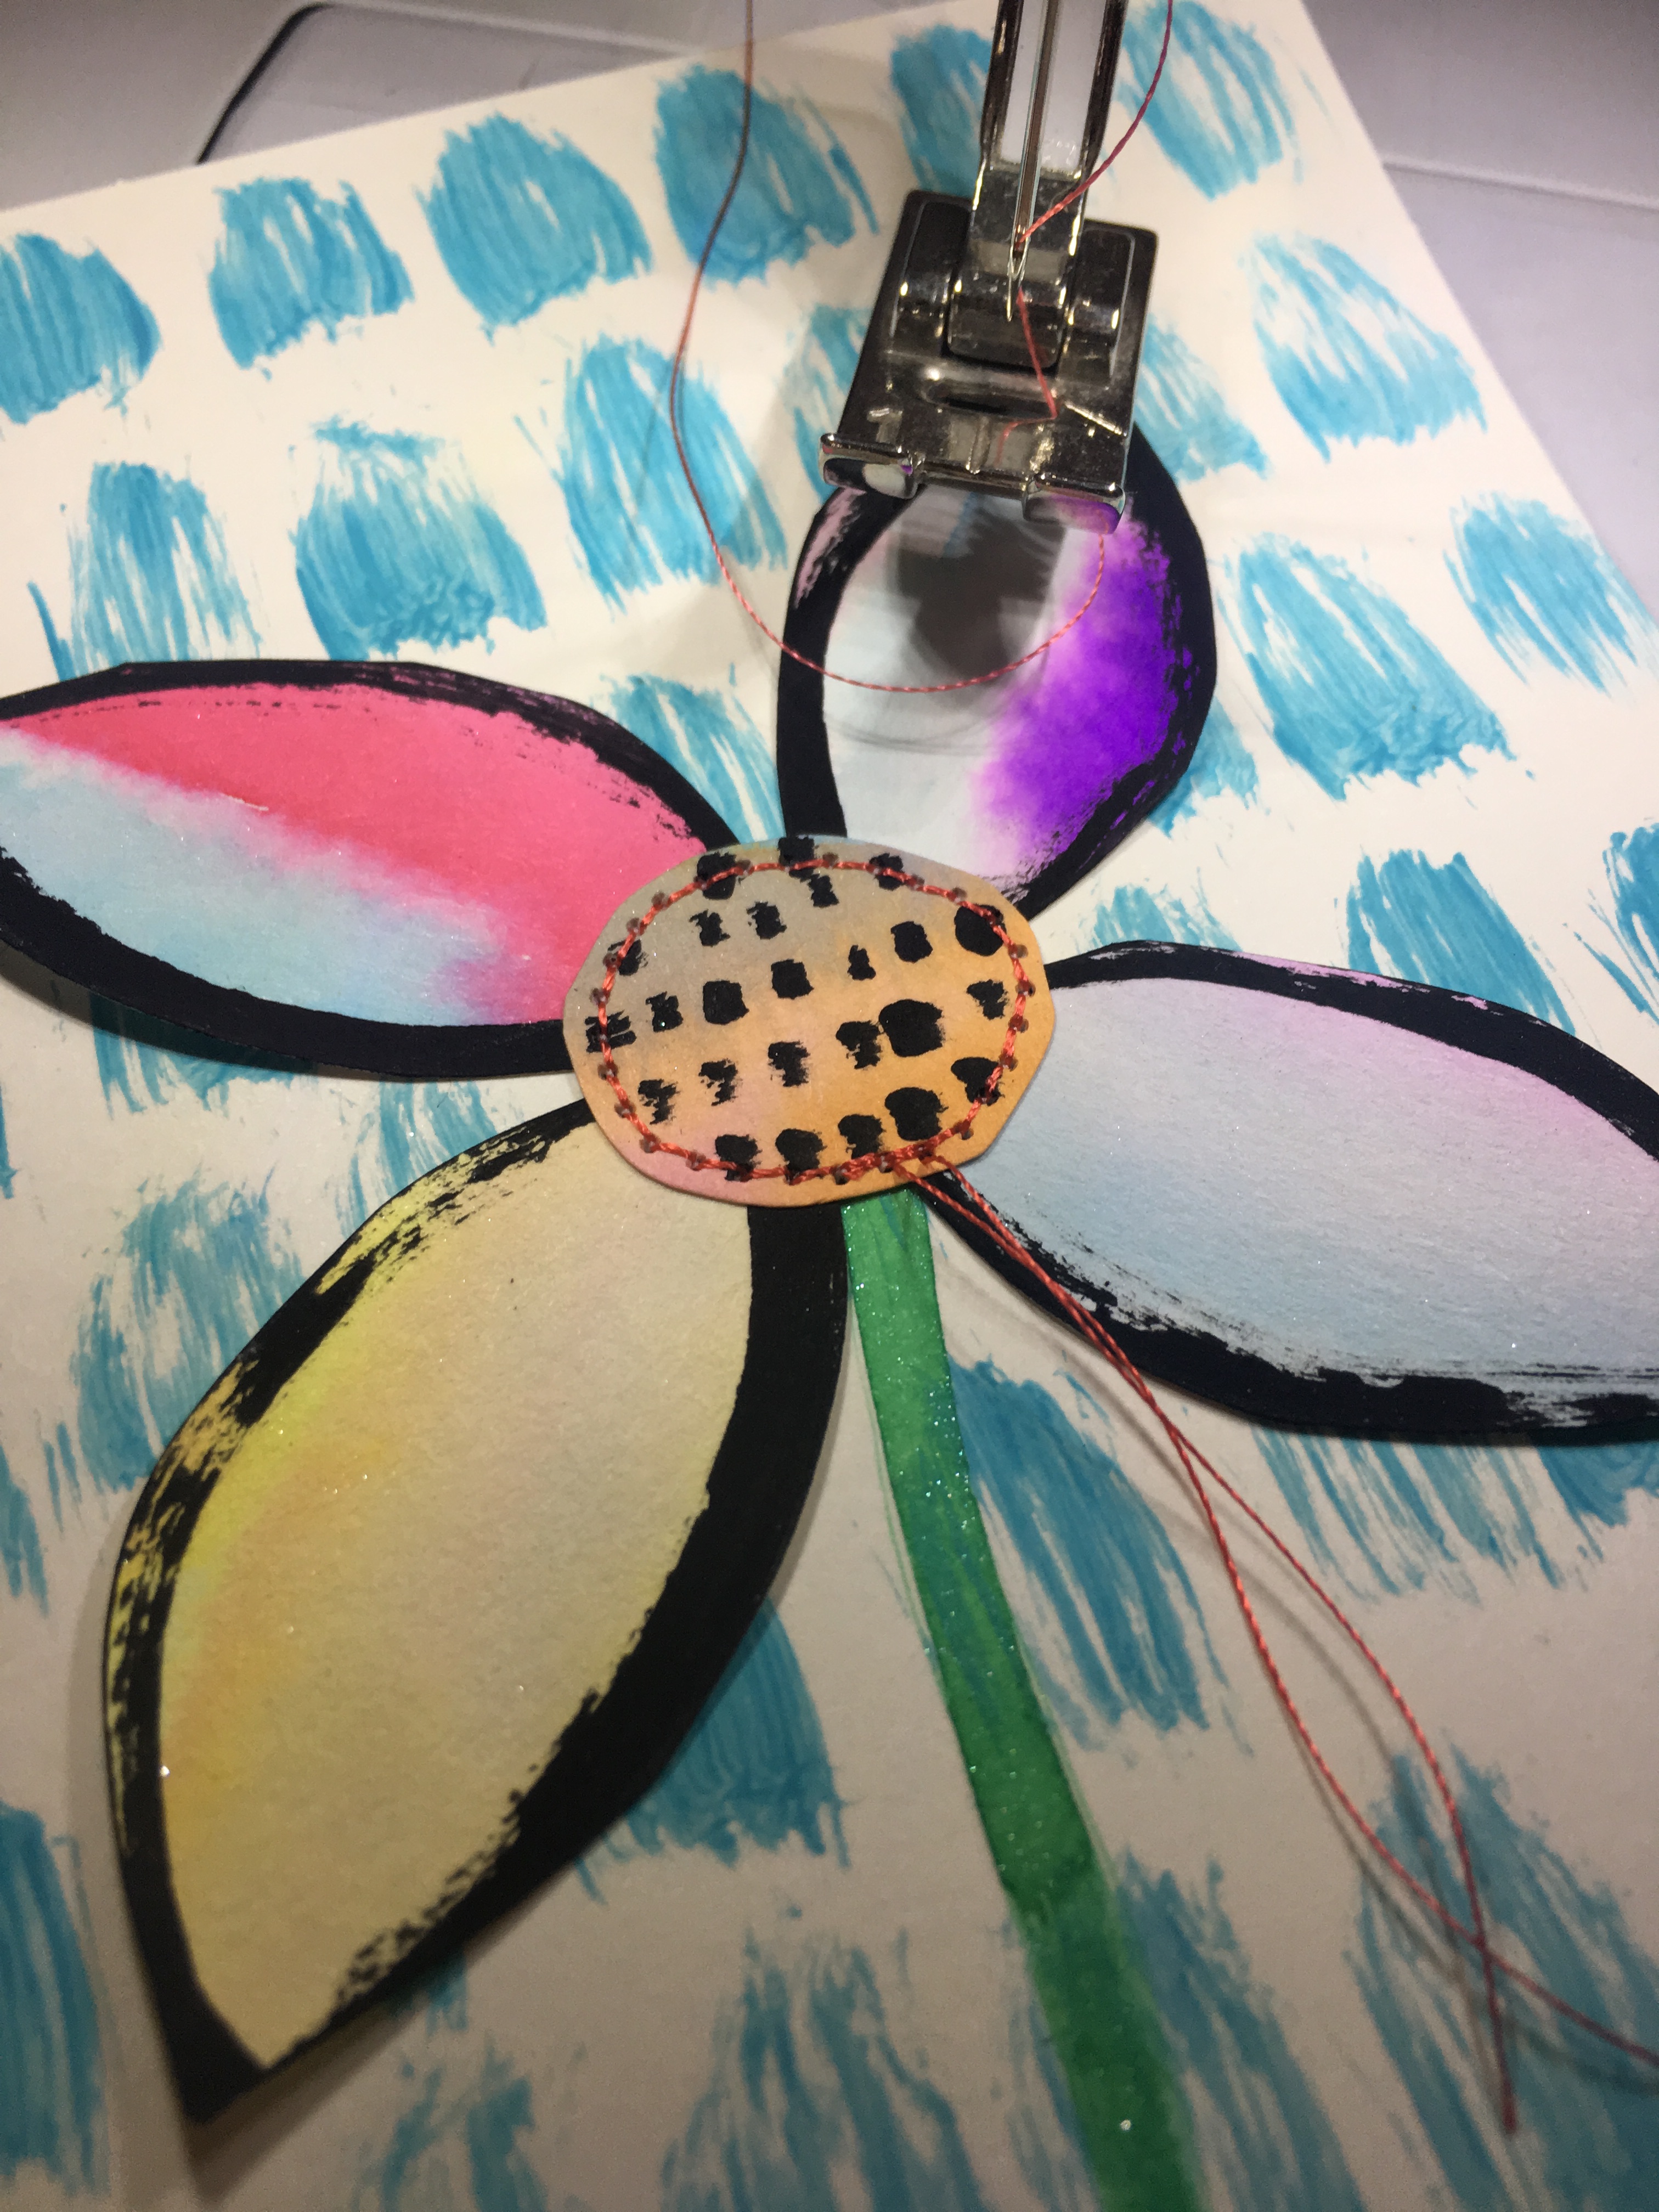
I used watercolors to paint the stem.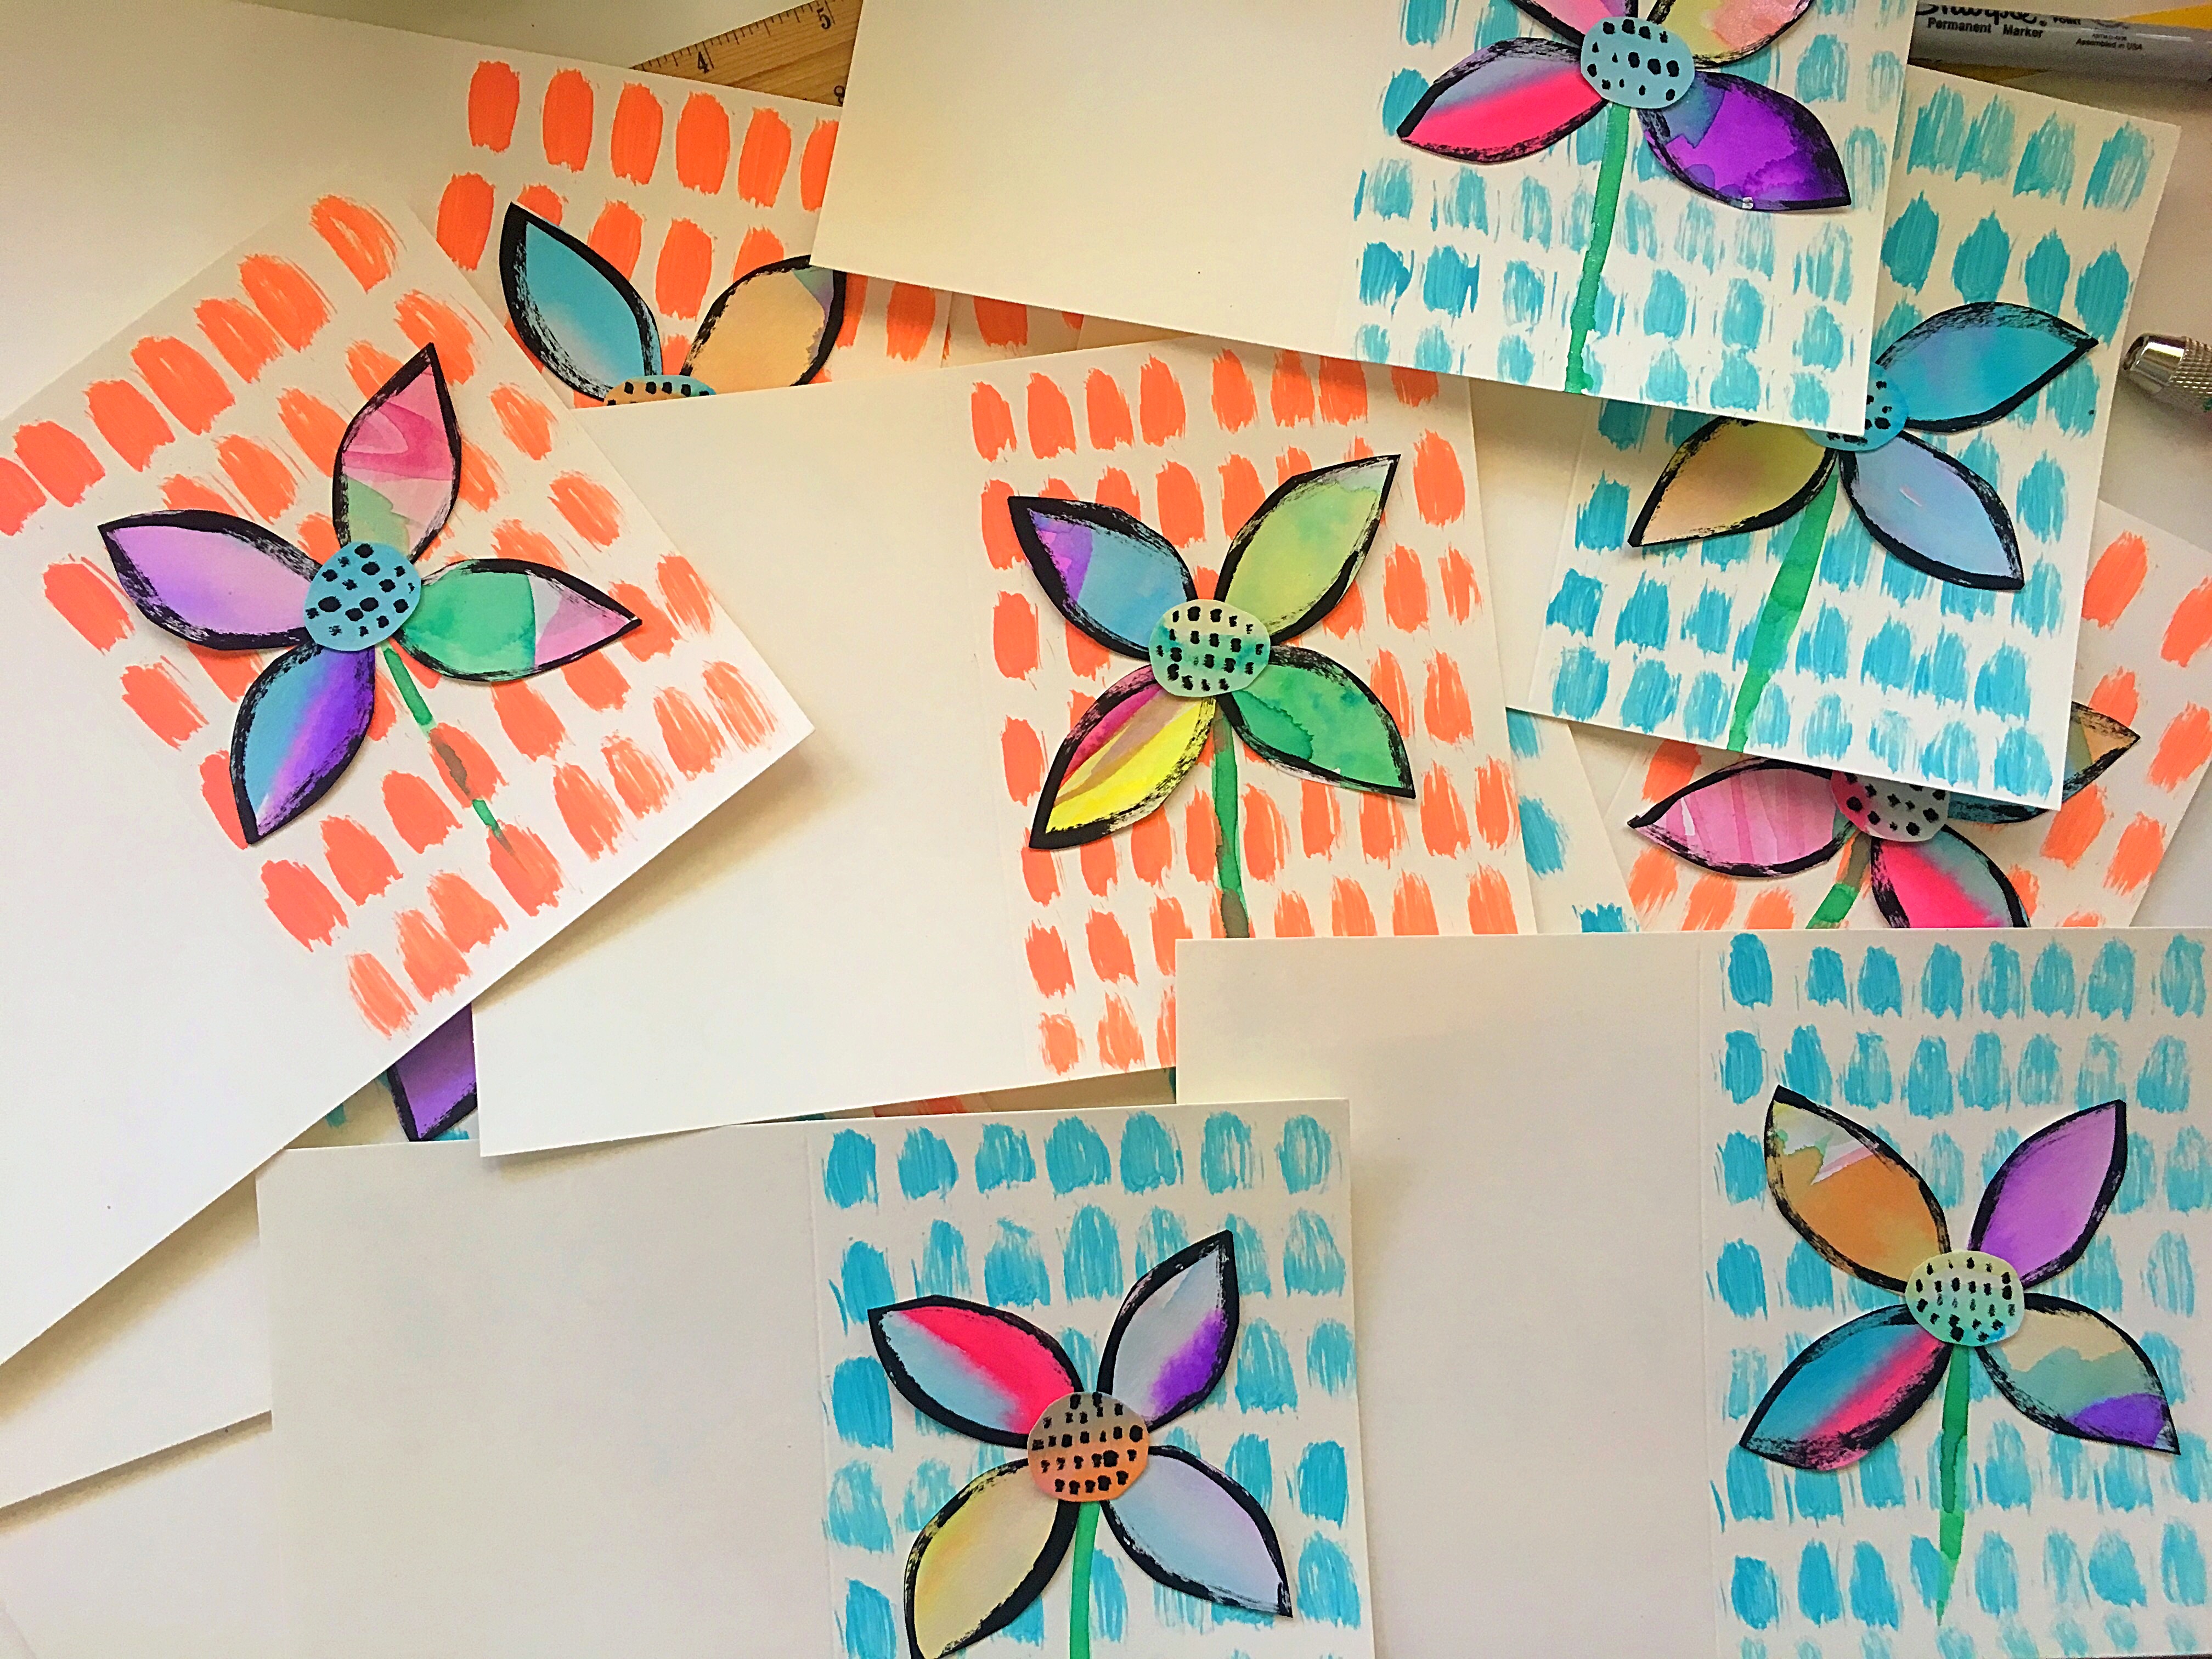
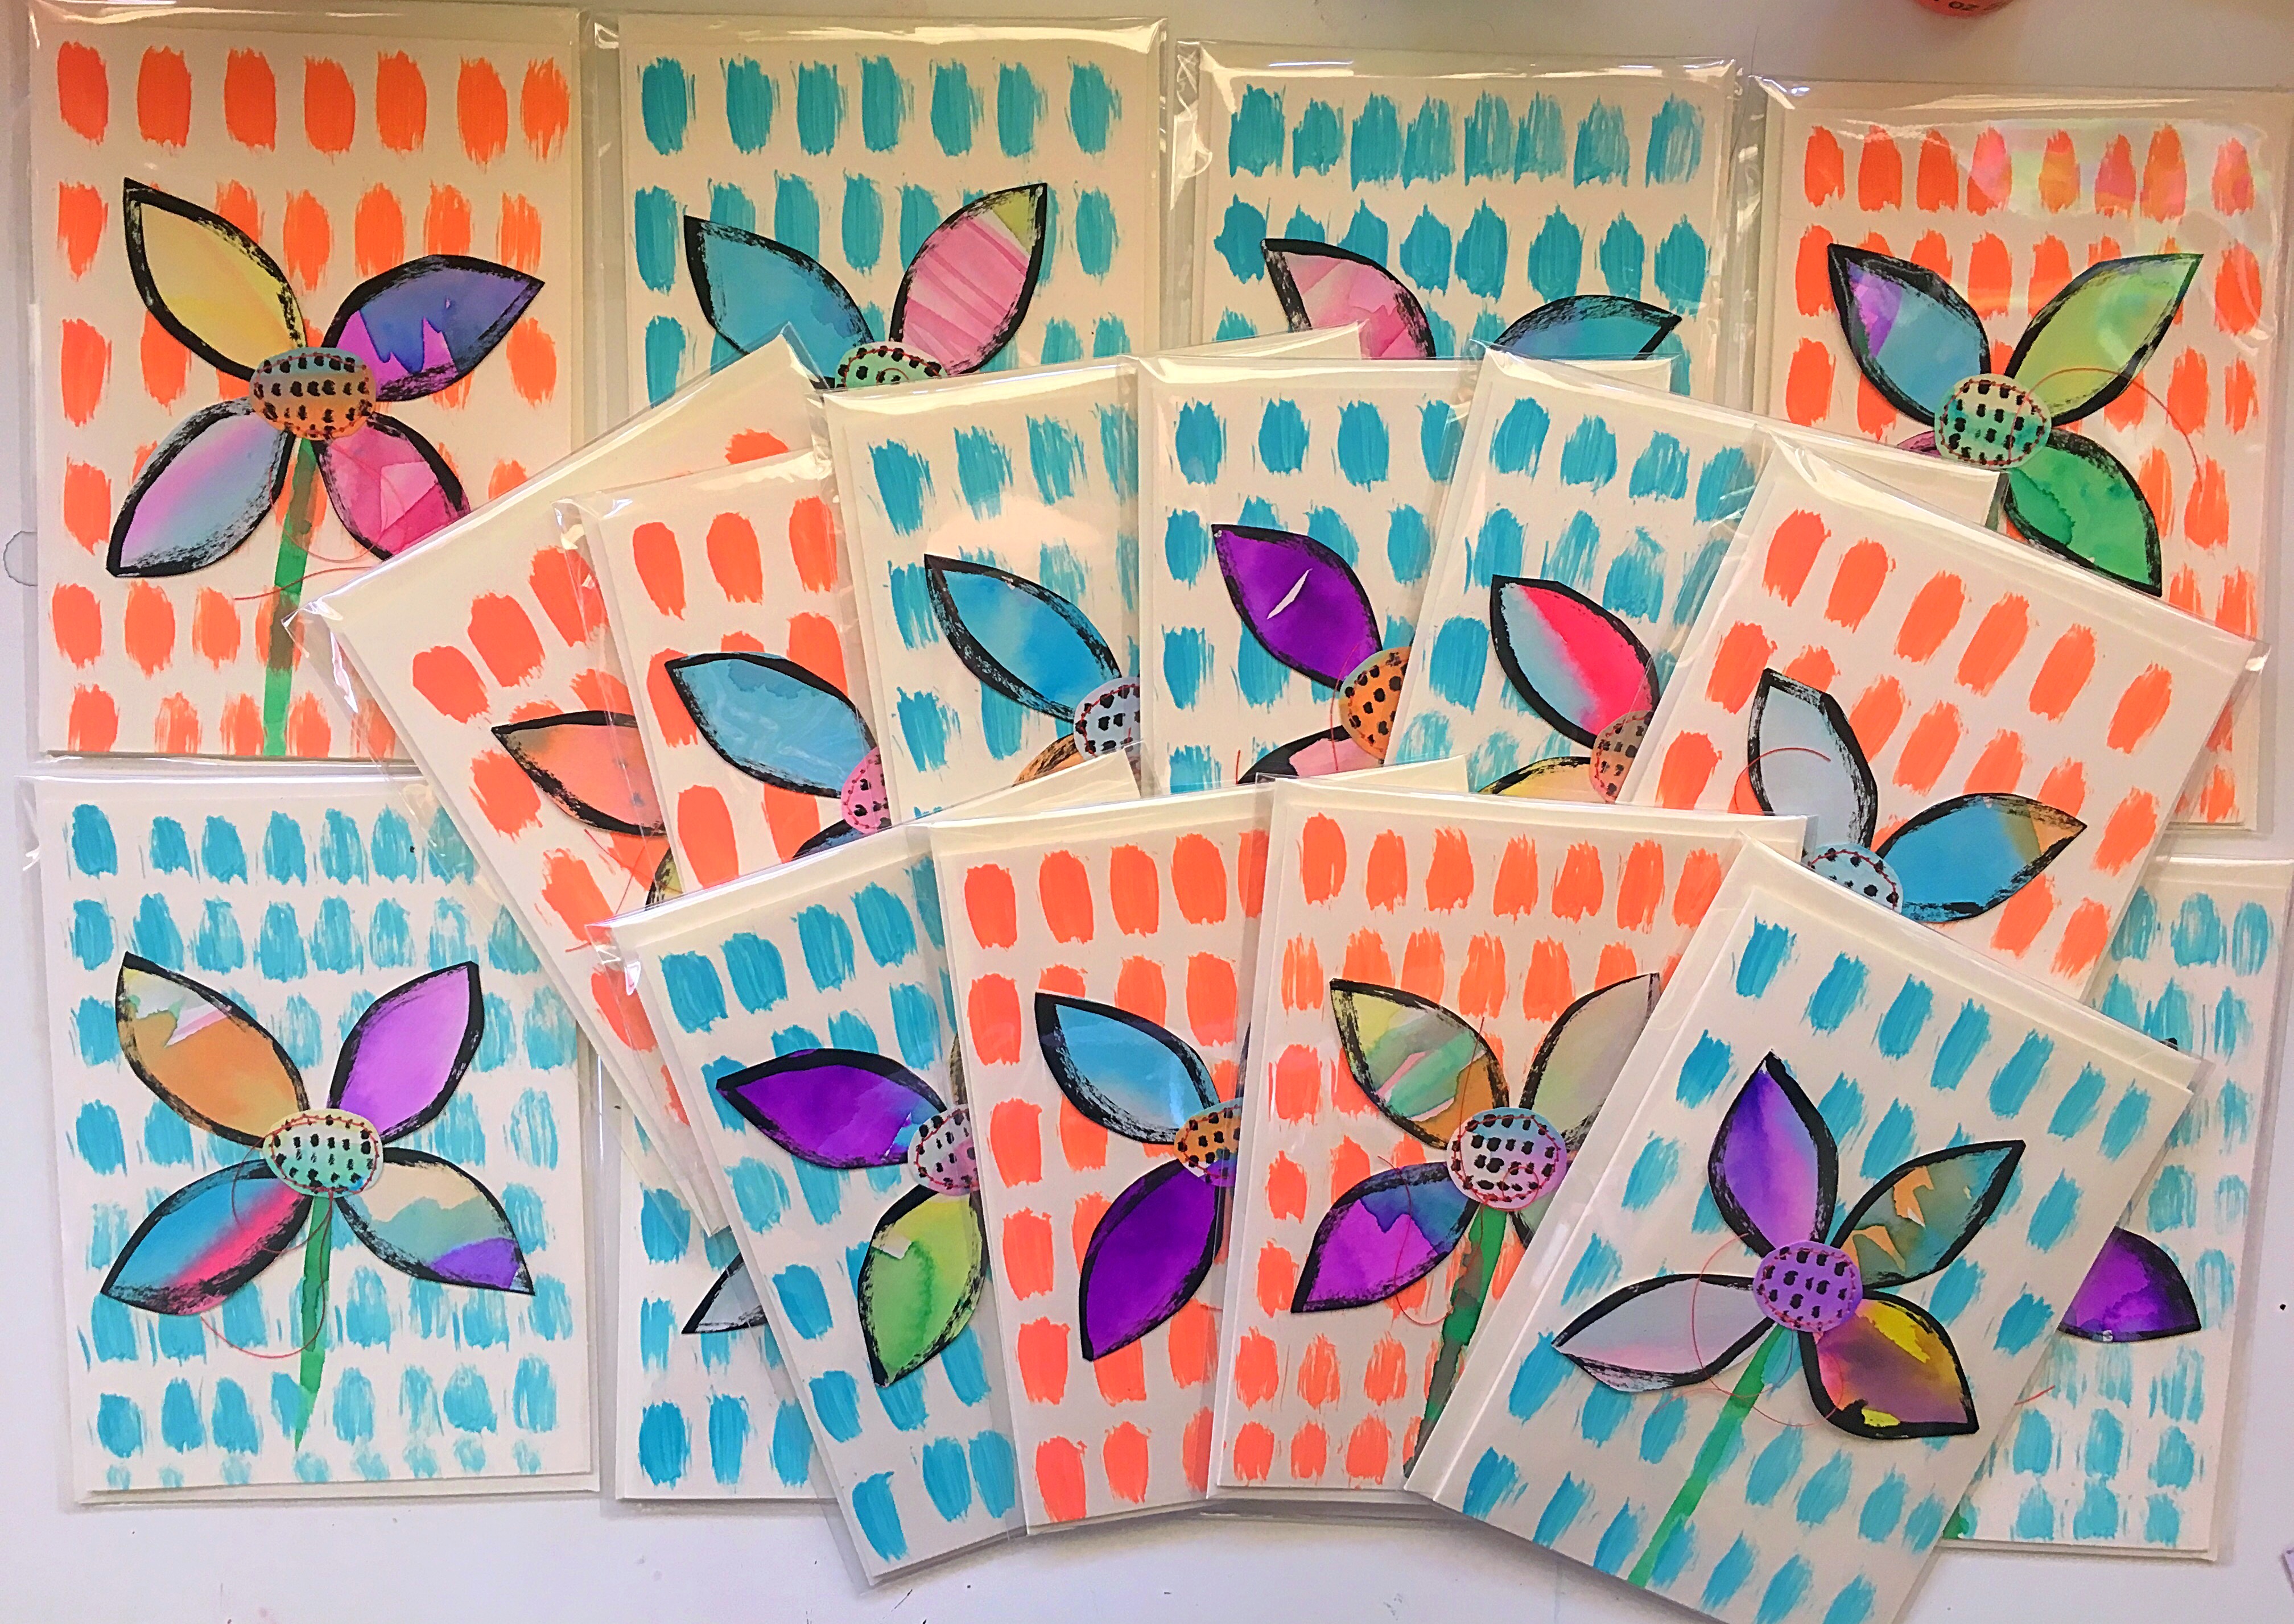
And you are done! Making them that is. Now think of someone who would love to receive a handmade card and write them a note. Go to the post office and mail it.
I have a stack available at Vision Gallery in downtown Chandler and at Practical Art in Phoenix.


[…] playing with watercolors and ended up with several pages of watercolor wash. I used some to make cards and the rest I decided to use to make resin […]