

A few years ago I wanted an original small Easter bunny made out of fabric. Since I can sew I decided to try and make my own template and see what comes of it. The results were very these cute little bunnies and if you are looking for a quick sewing project these Easter bunnies DIY are for you.
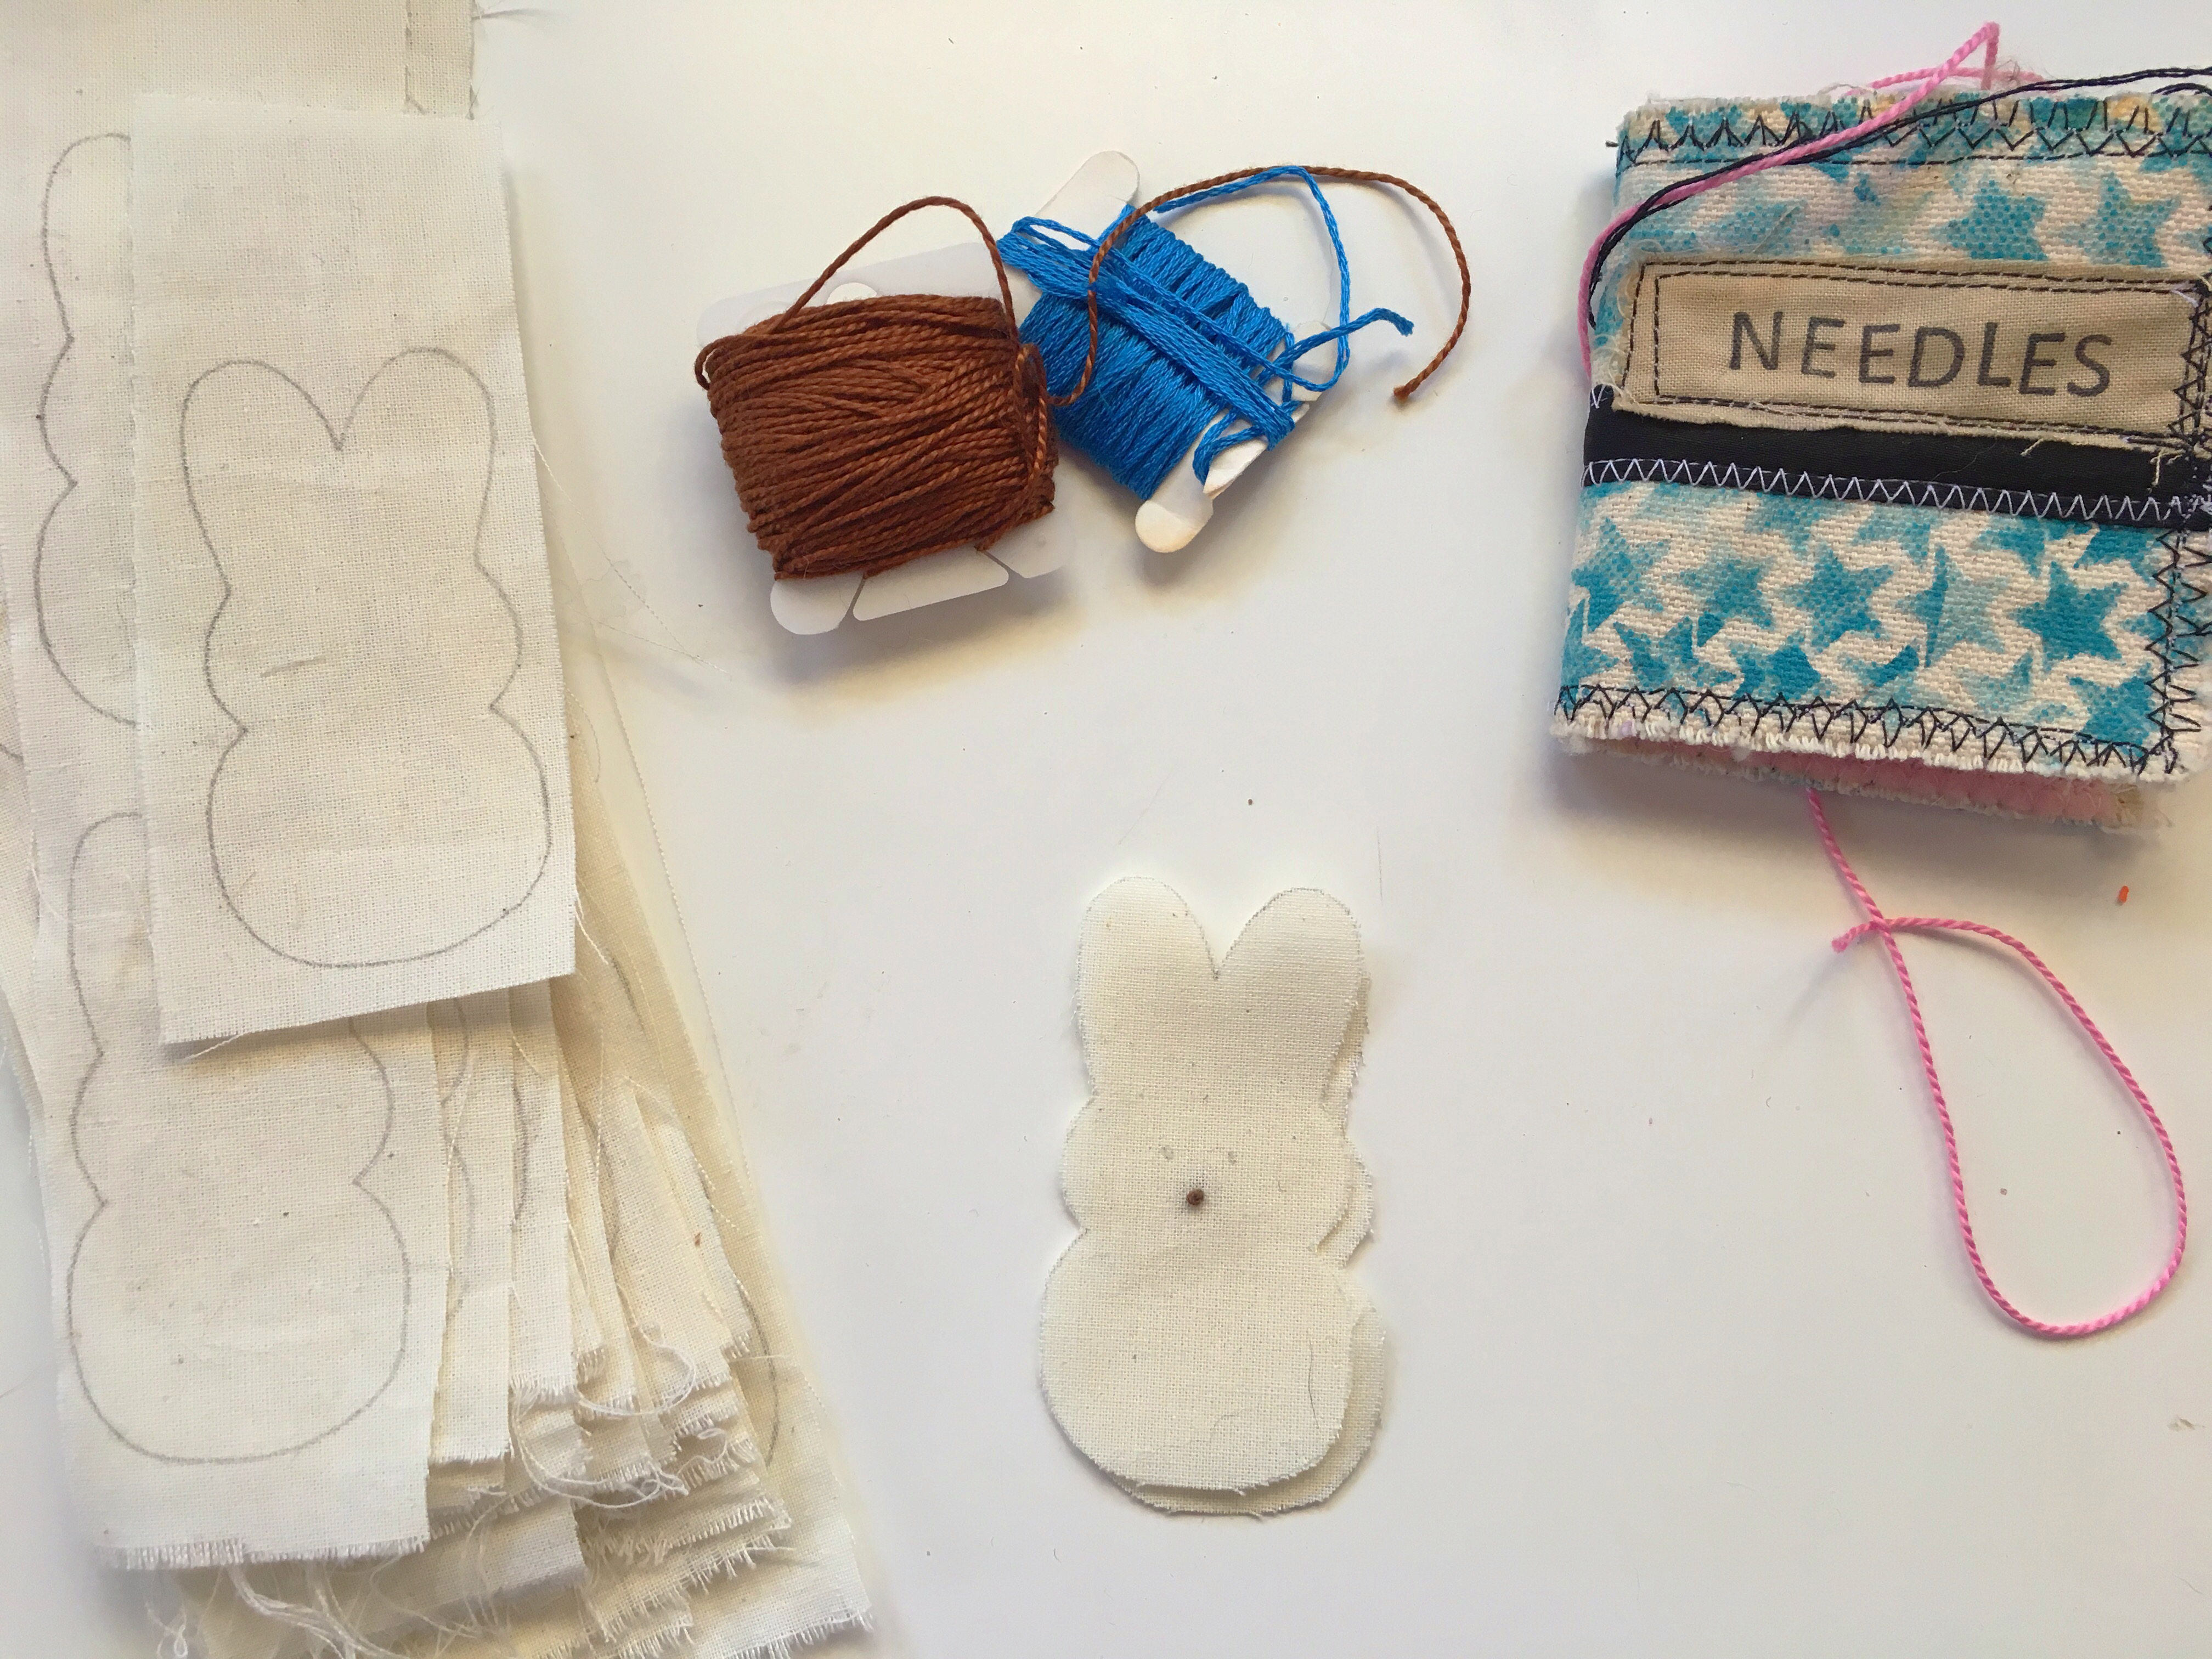
Supplies: Muslin, embroidery floss, thread, polyfill, left over ribbon, needle, sewing machine (optional, you can probably handstich the seams, it will just take longer).
Process:
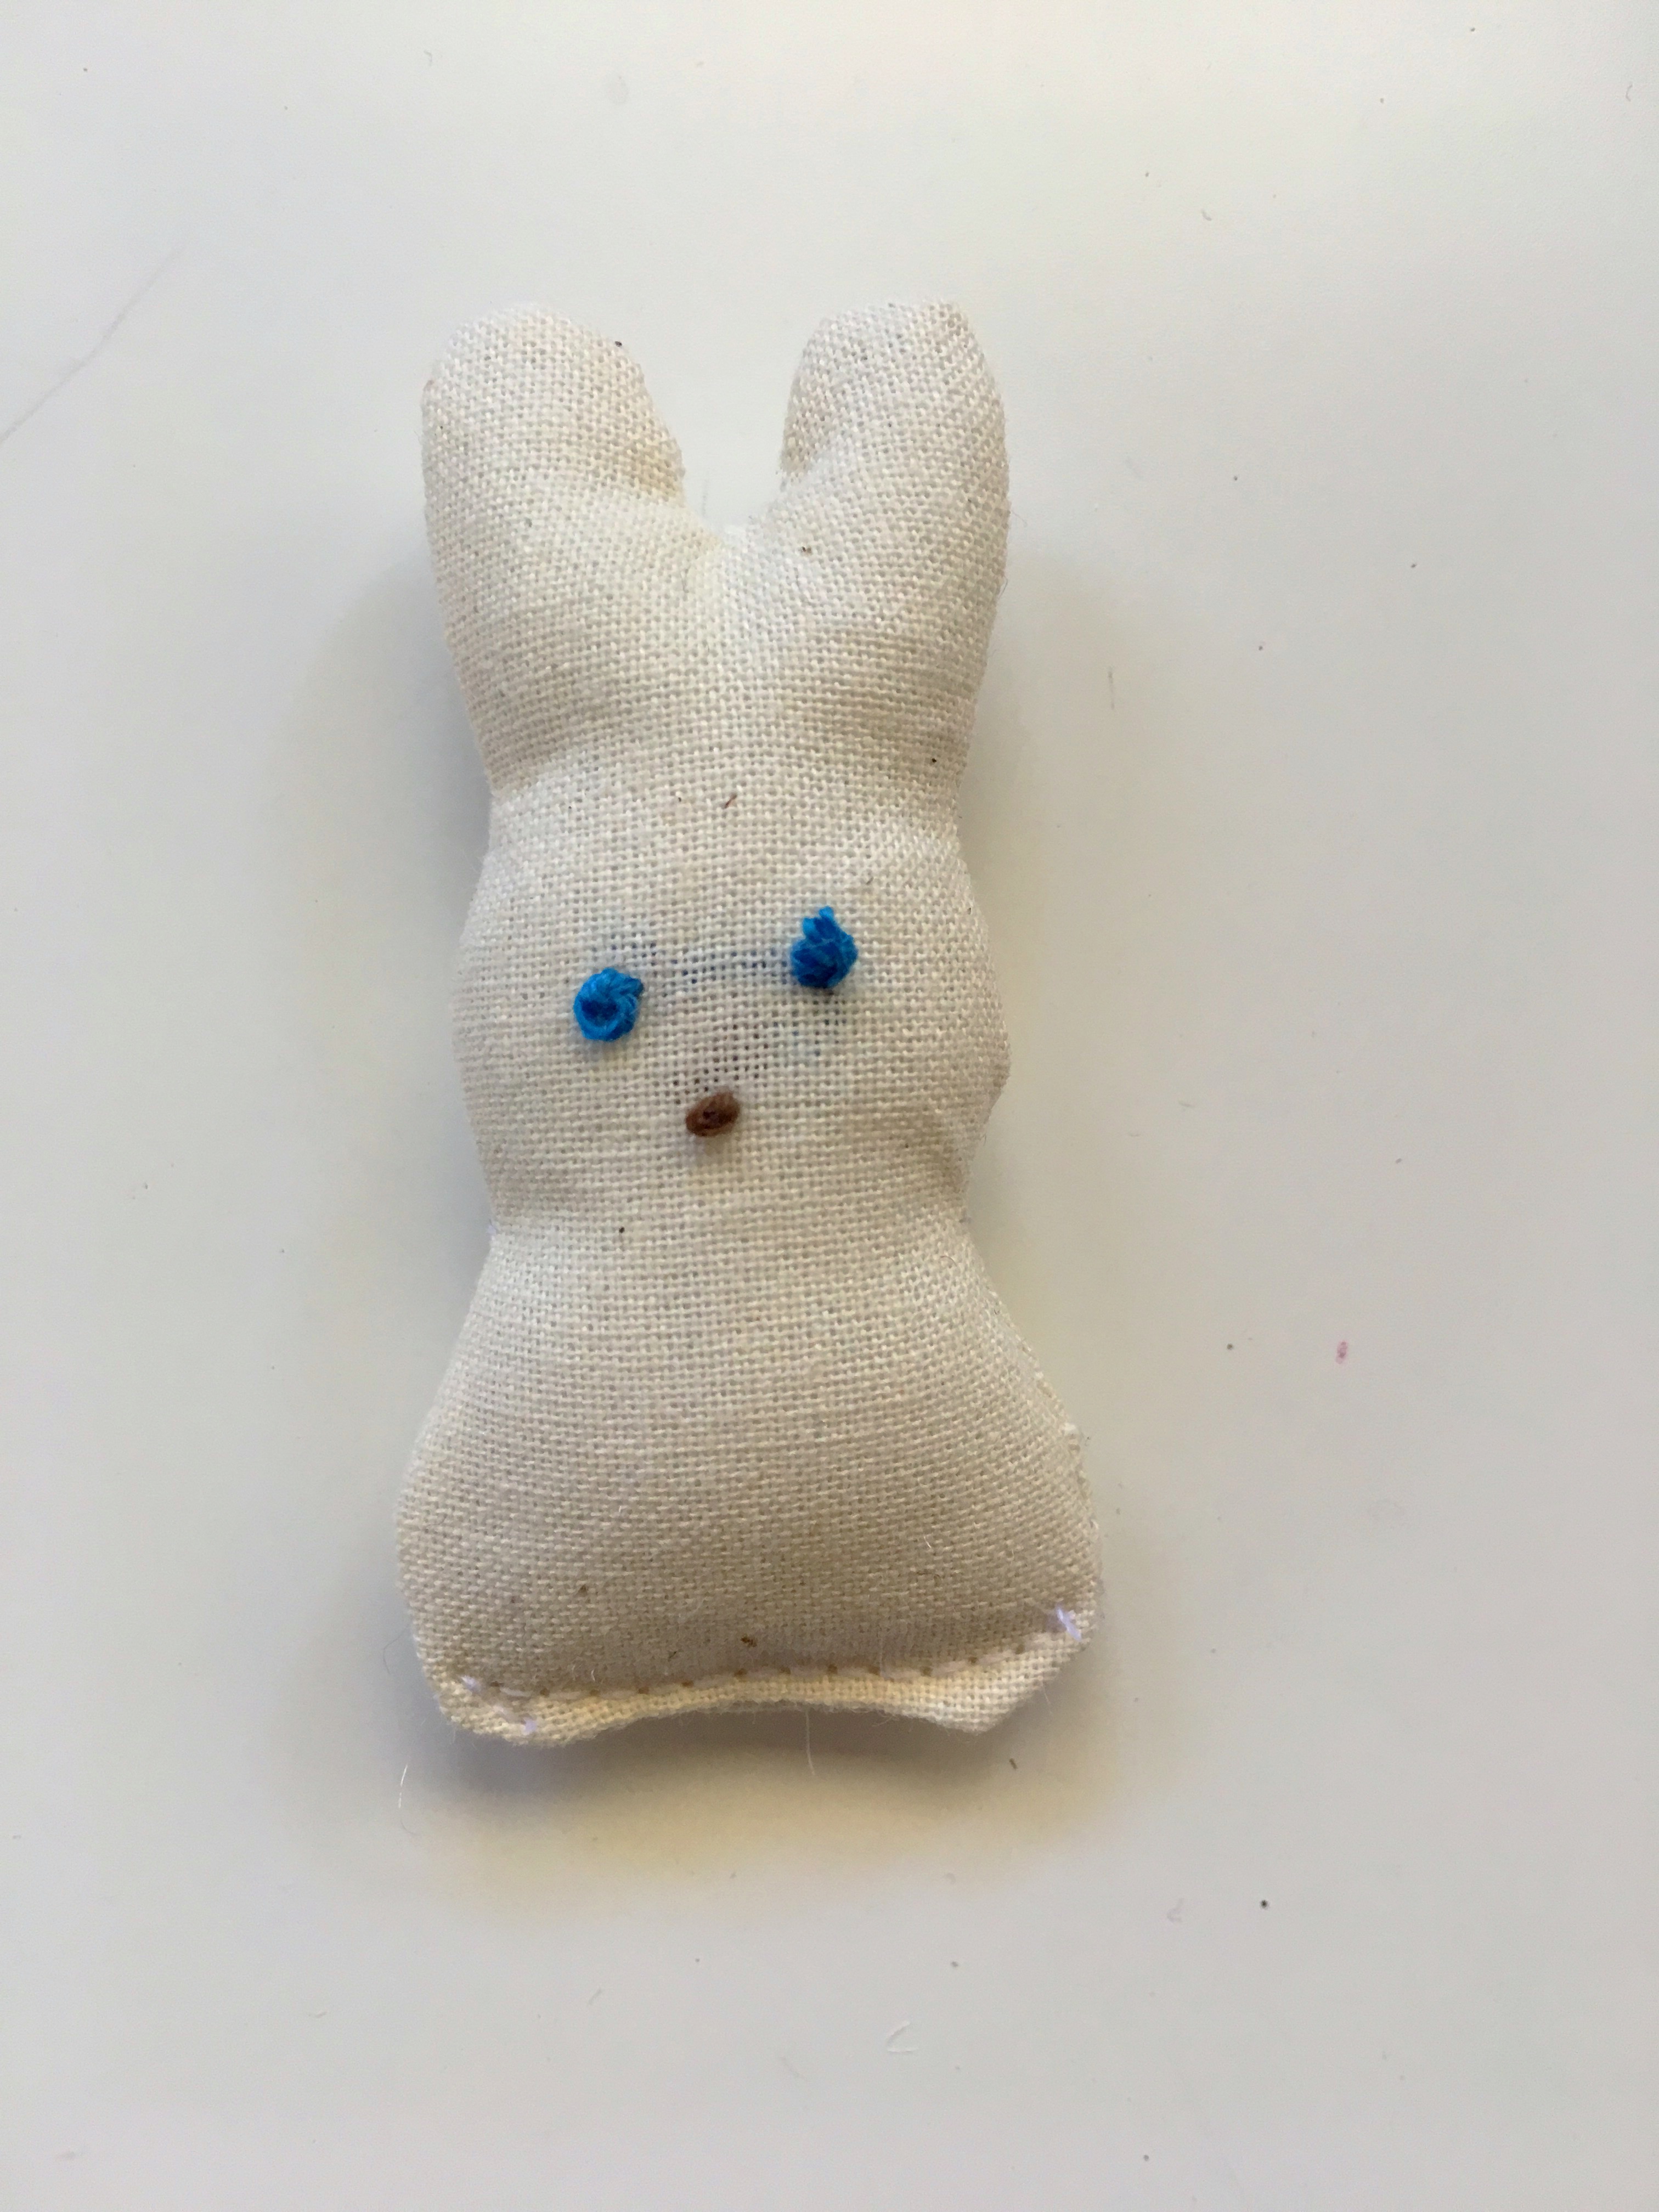
Trace the template on to your muslin. Cut it out (two per bunny). Using embroidery floss make three French knots in a triangle distance (two for the eyes and one for the nose)

Put right sides together and stitch along the edges on your sewing machine leaving the bottom open so you can fill it with stuffing. My template is small and the seams will be super small (less than 1/4 inch). If sewing small is too troublesome for you, make a larger template.

Turn your bunny inside out. Again if it’s as small as mine, it may take some finagling. I use the tip of a large needle to get the ears out.
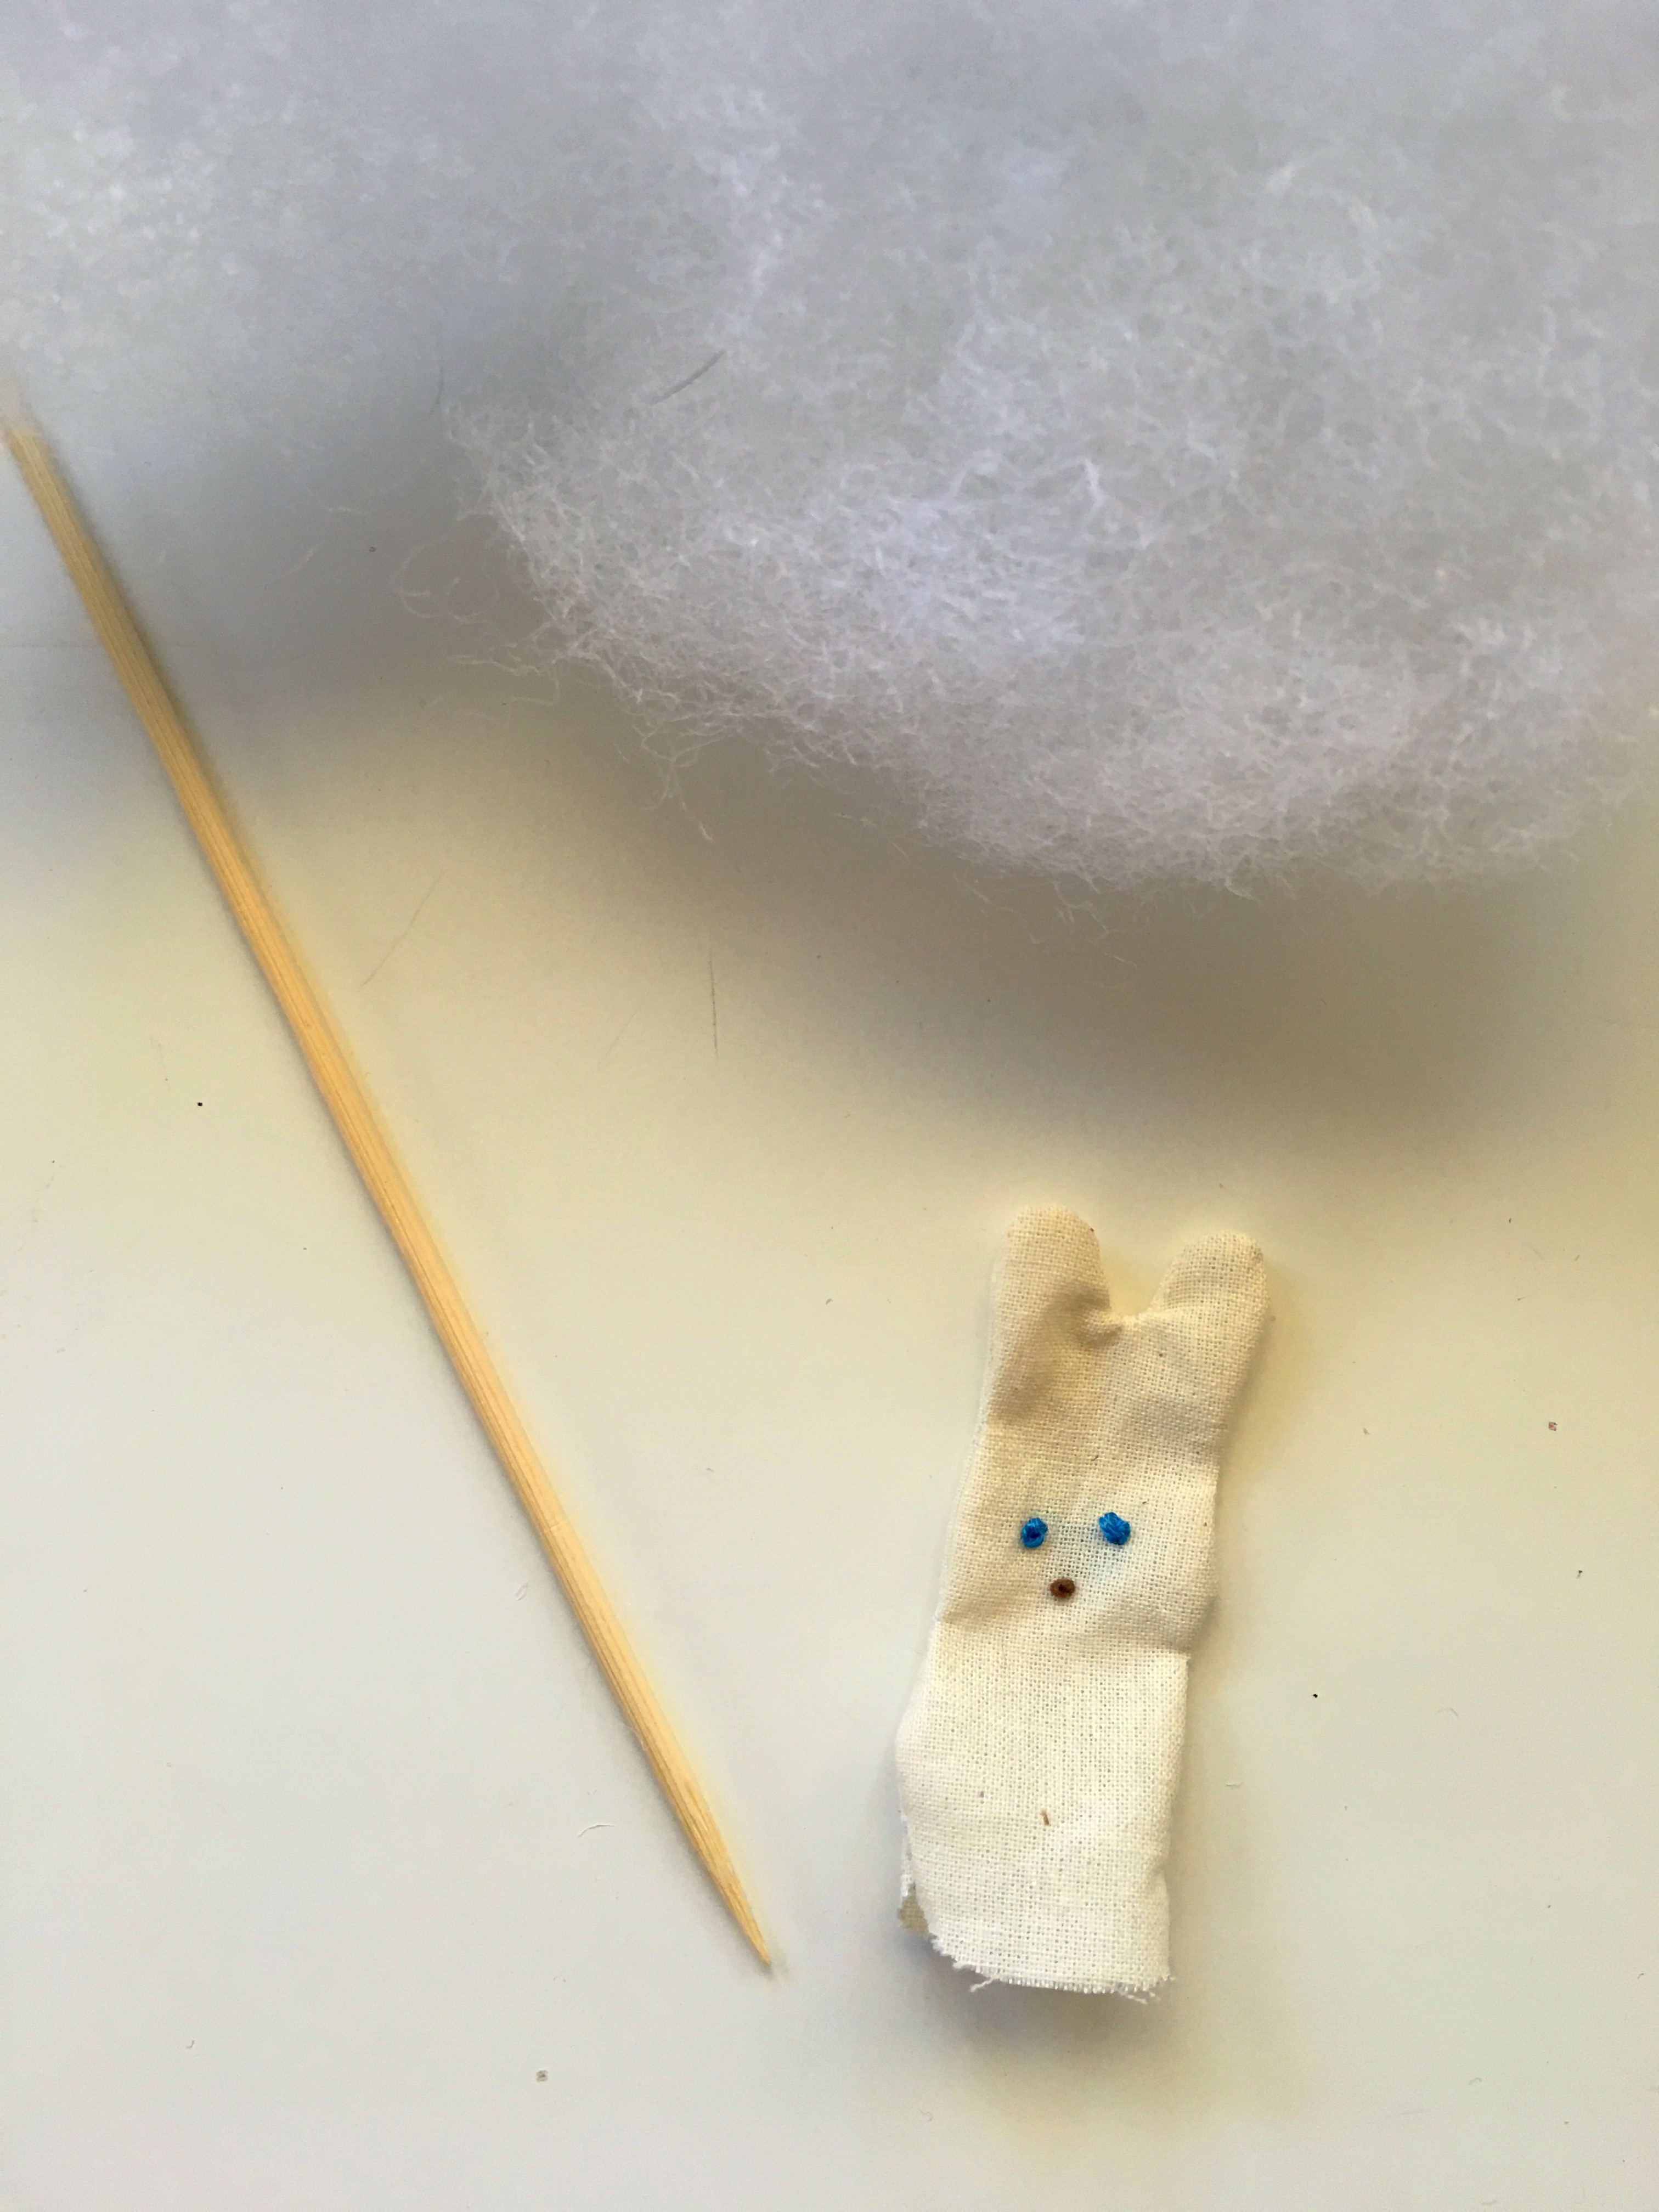
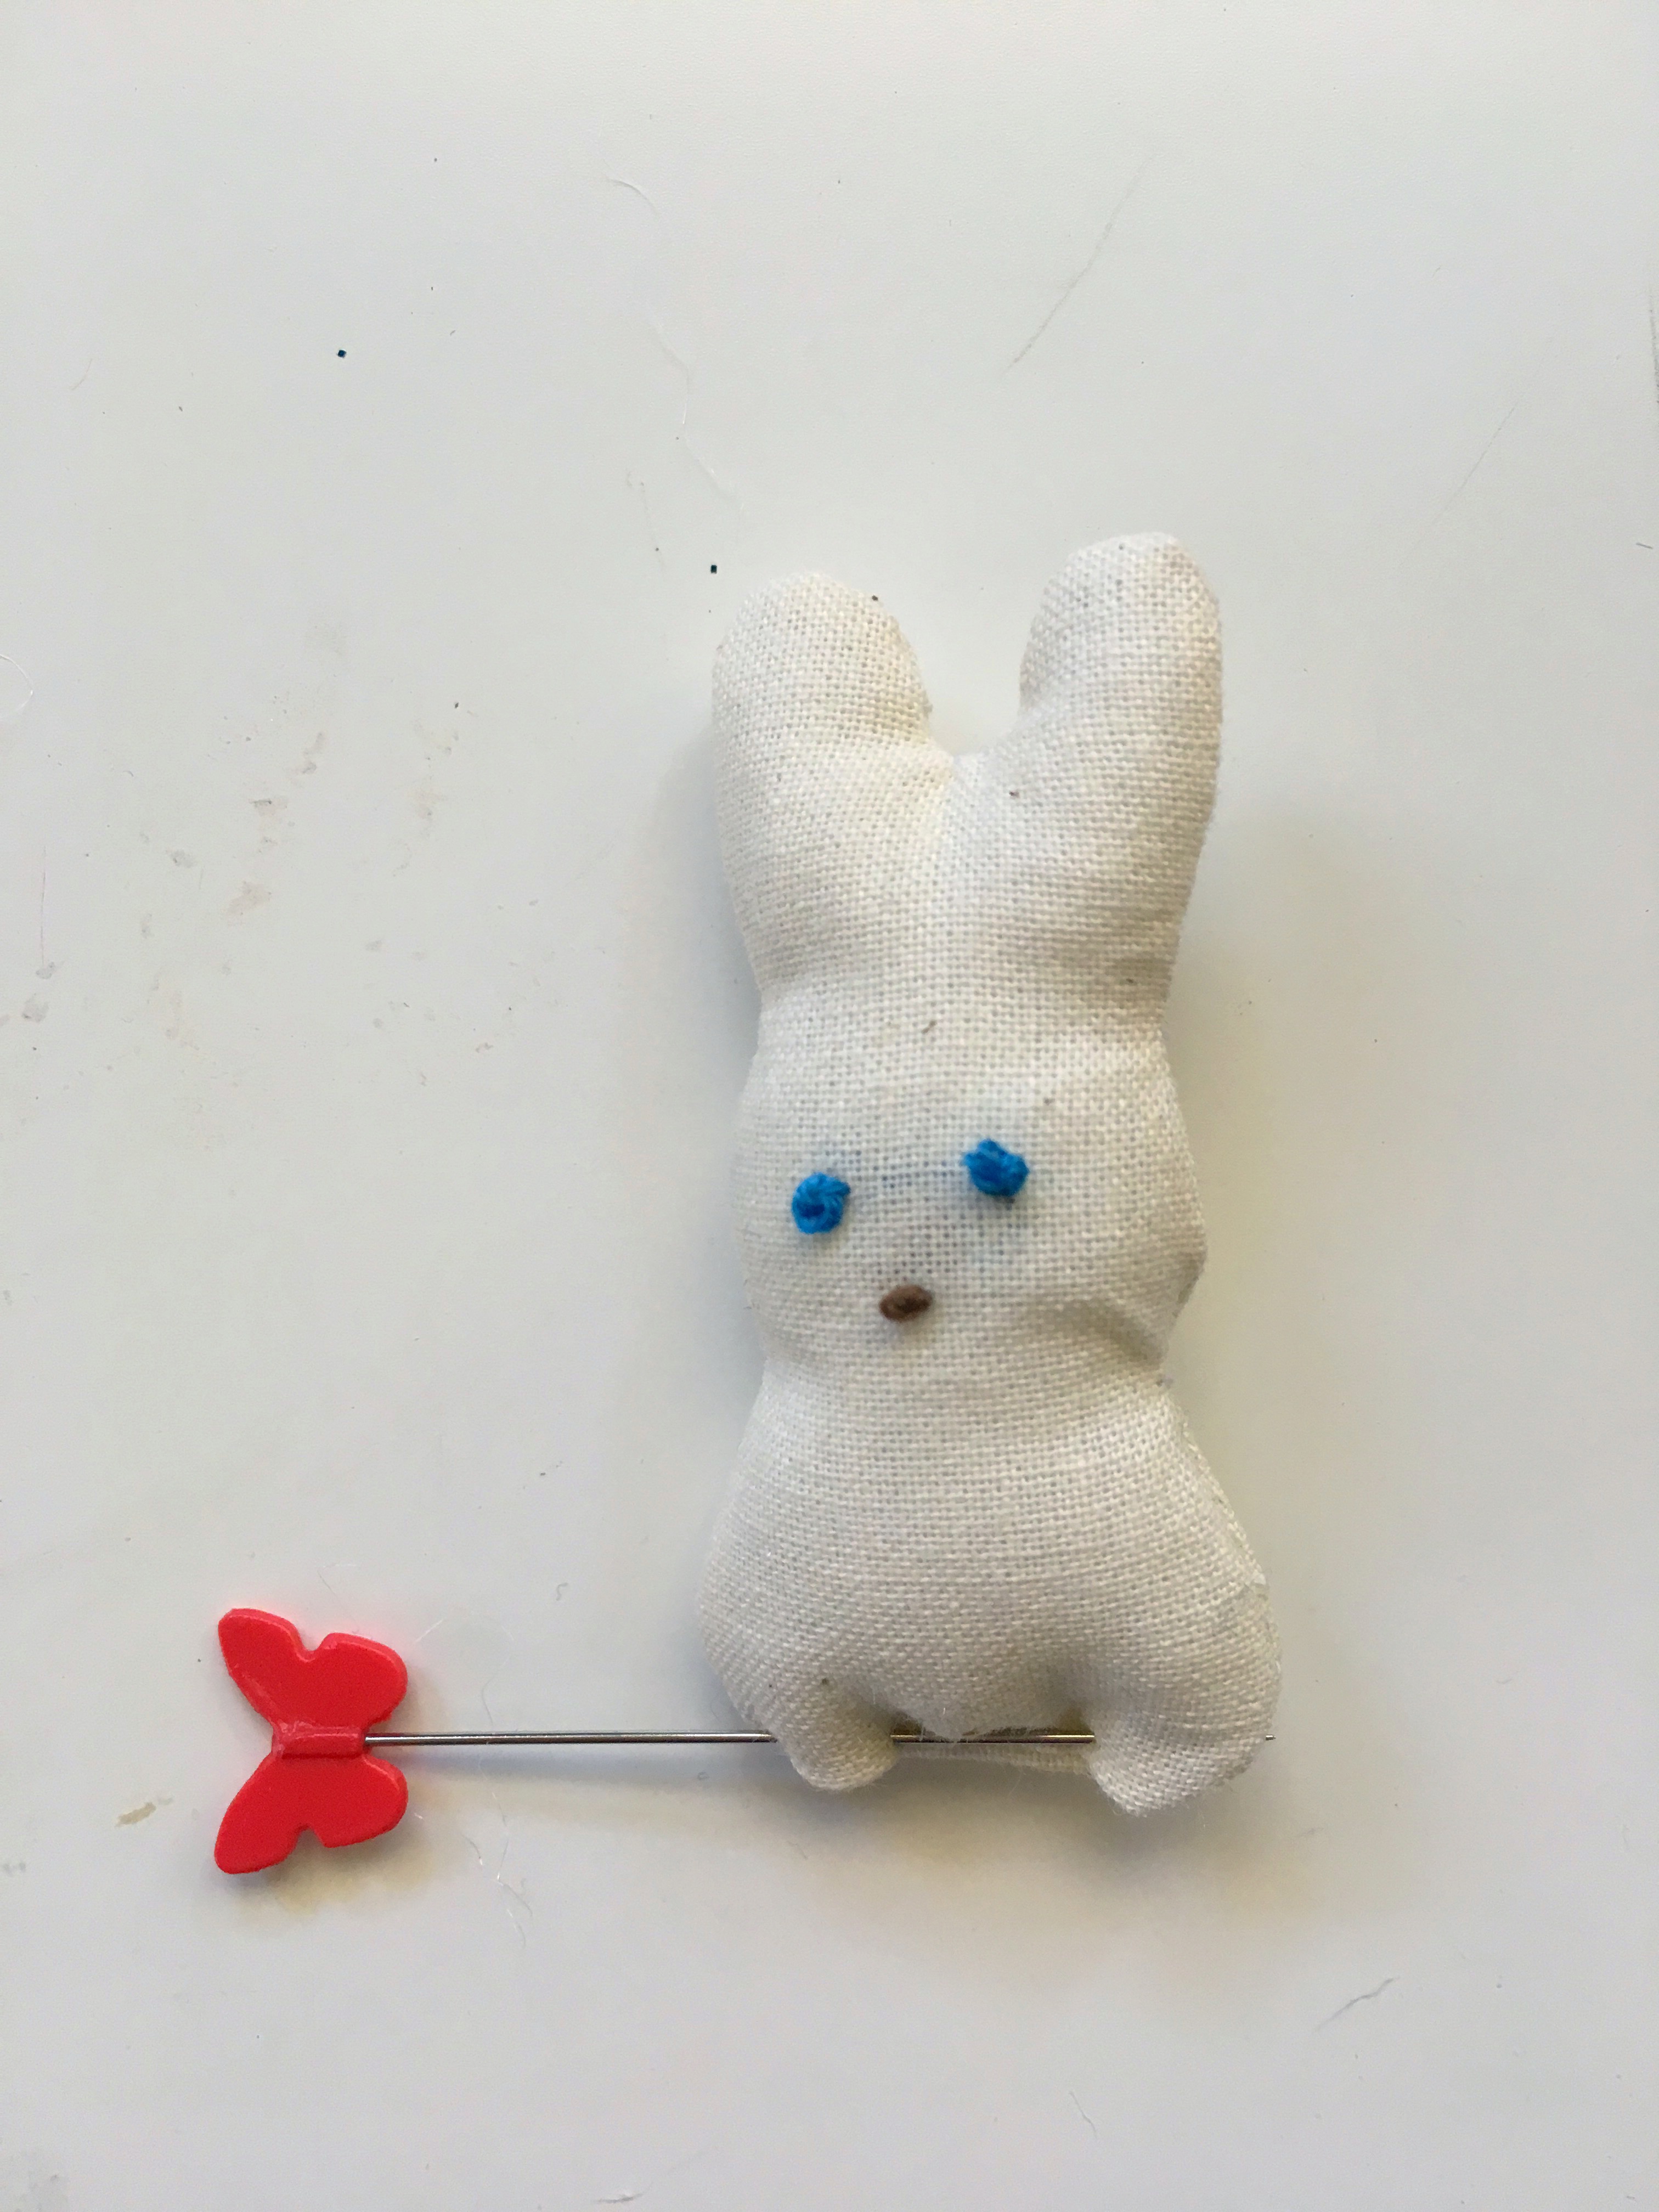
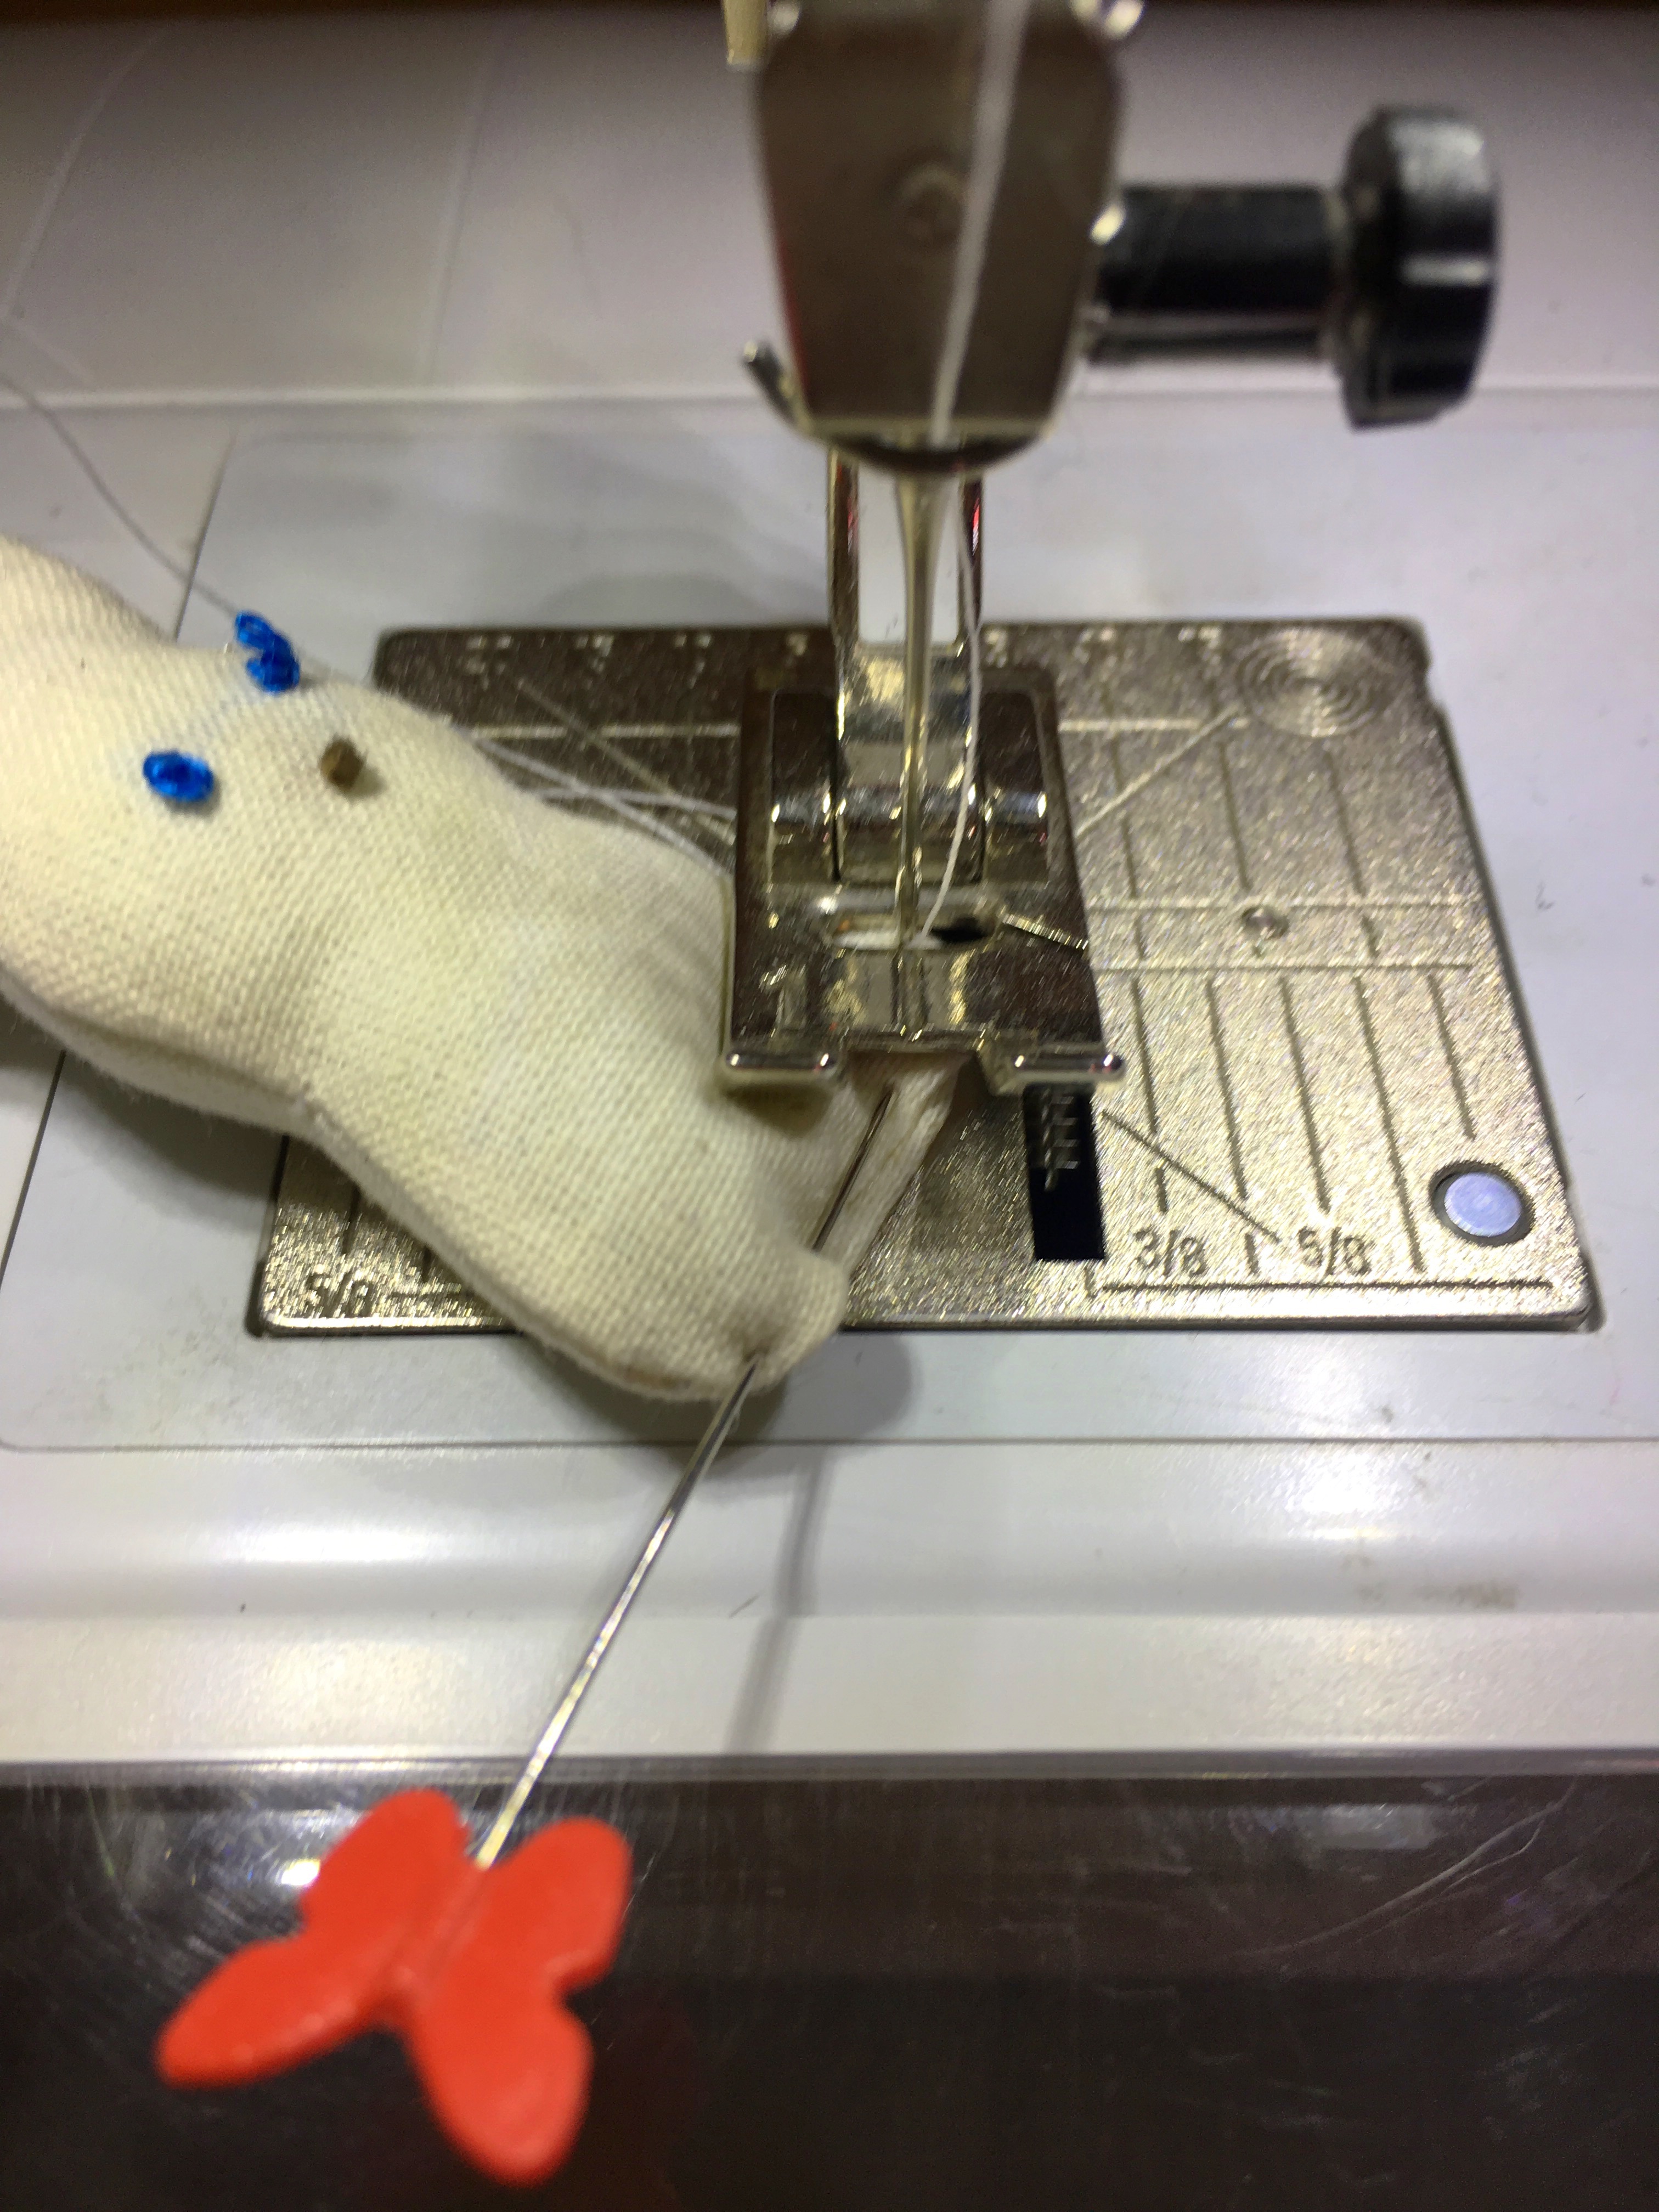
Stuff your bunny with polyfill. Fold a tiny seam at the bottom, secure it with a pin and stitch it shut either by hand or your sewing machine.
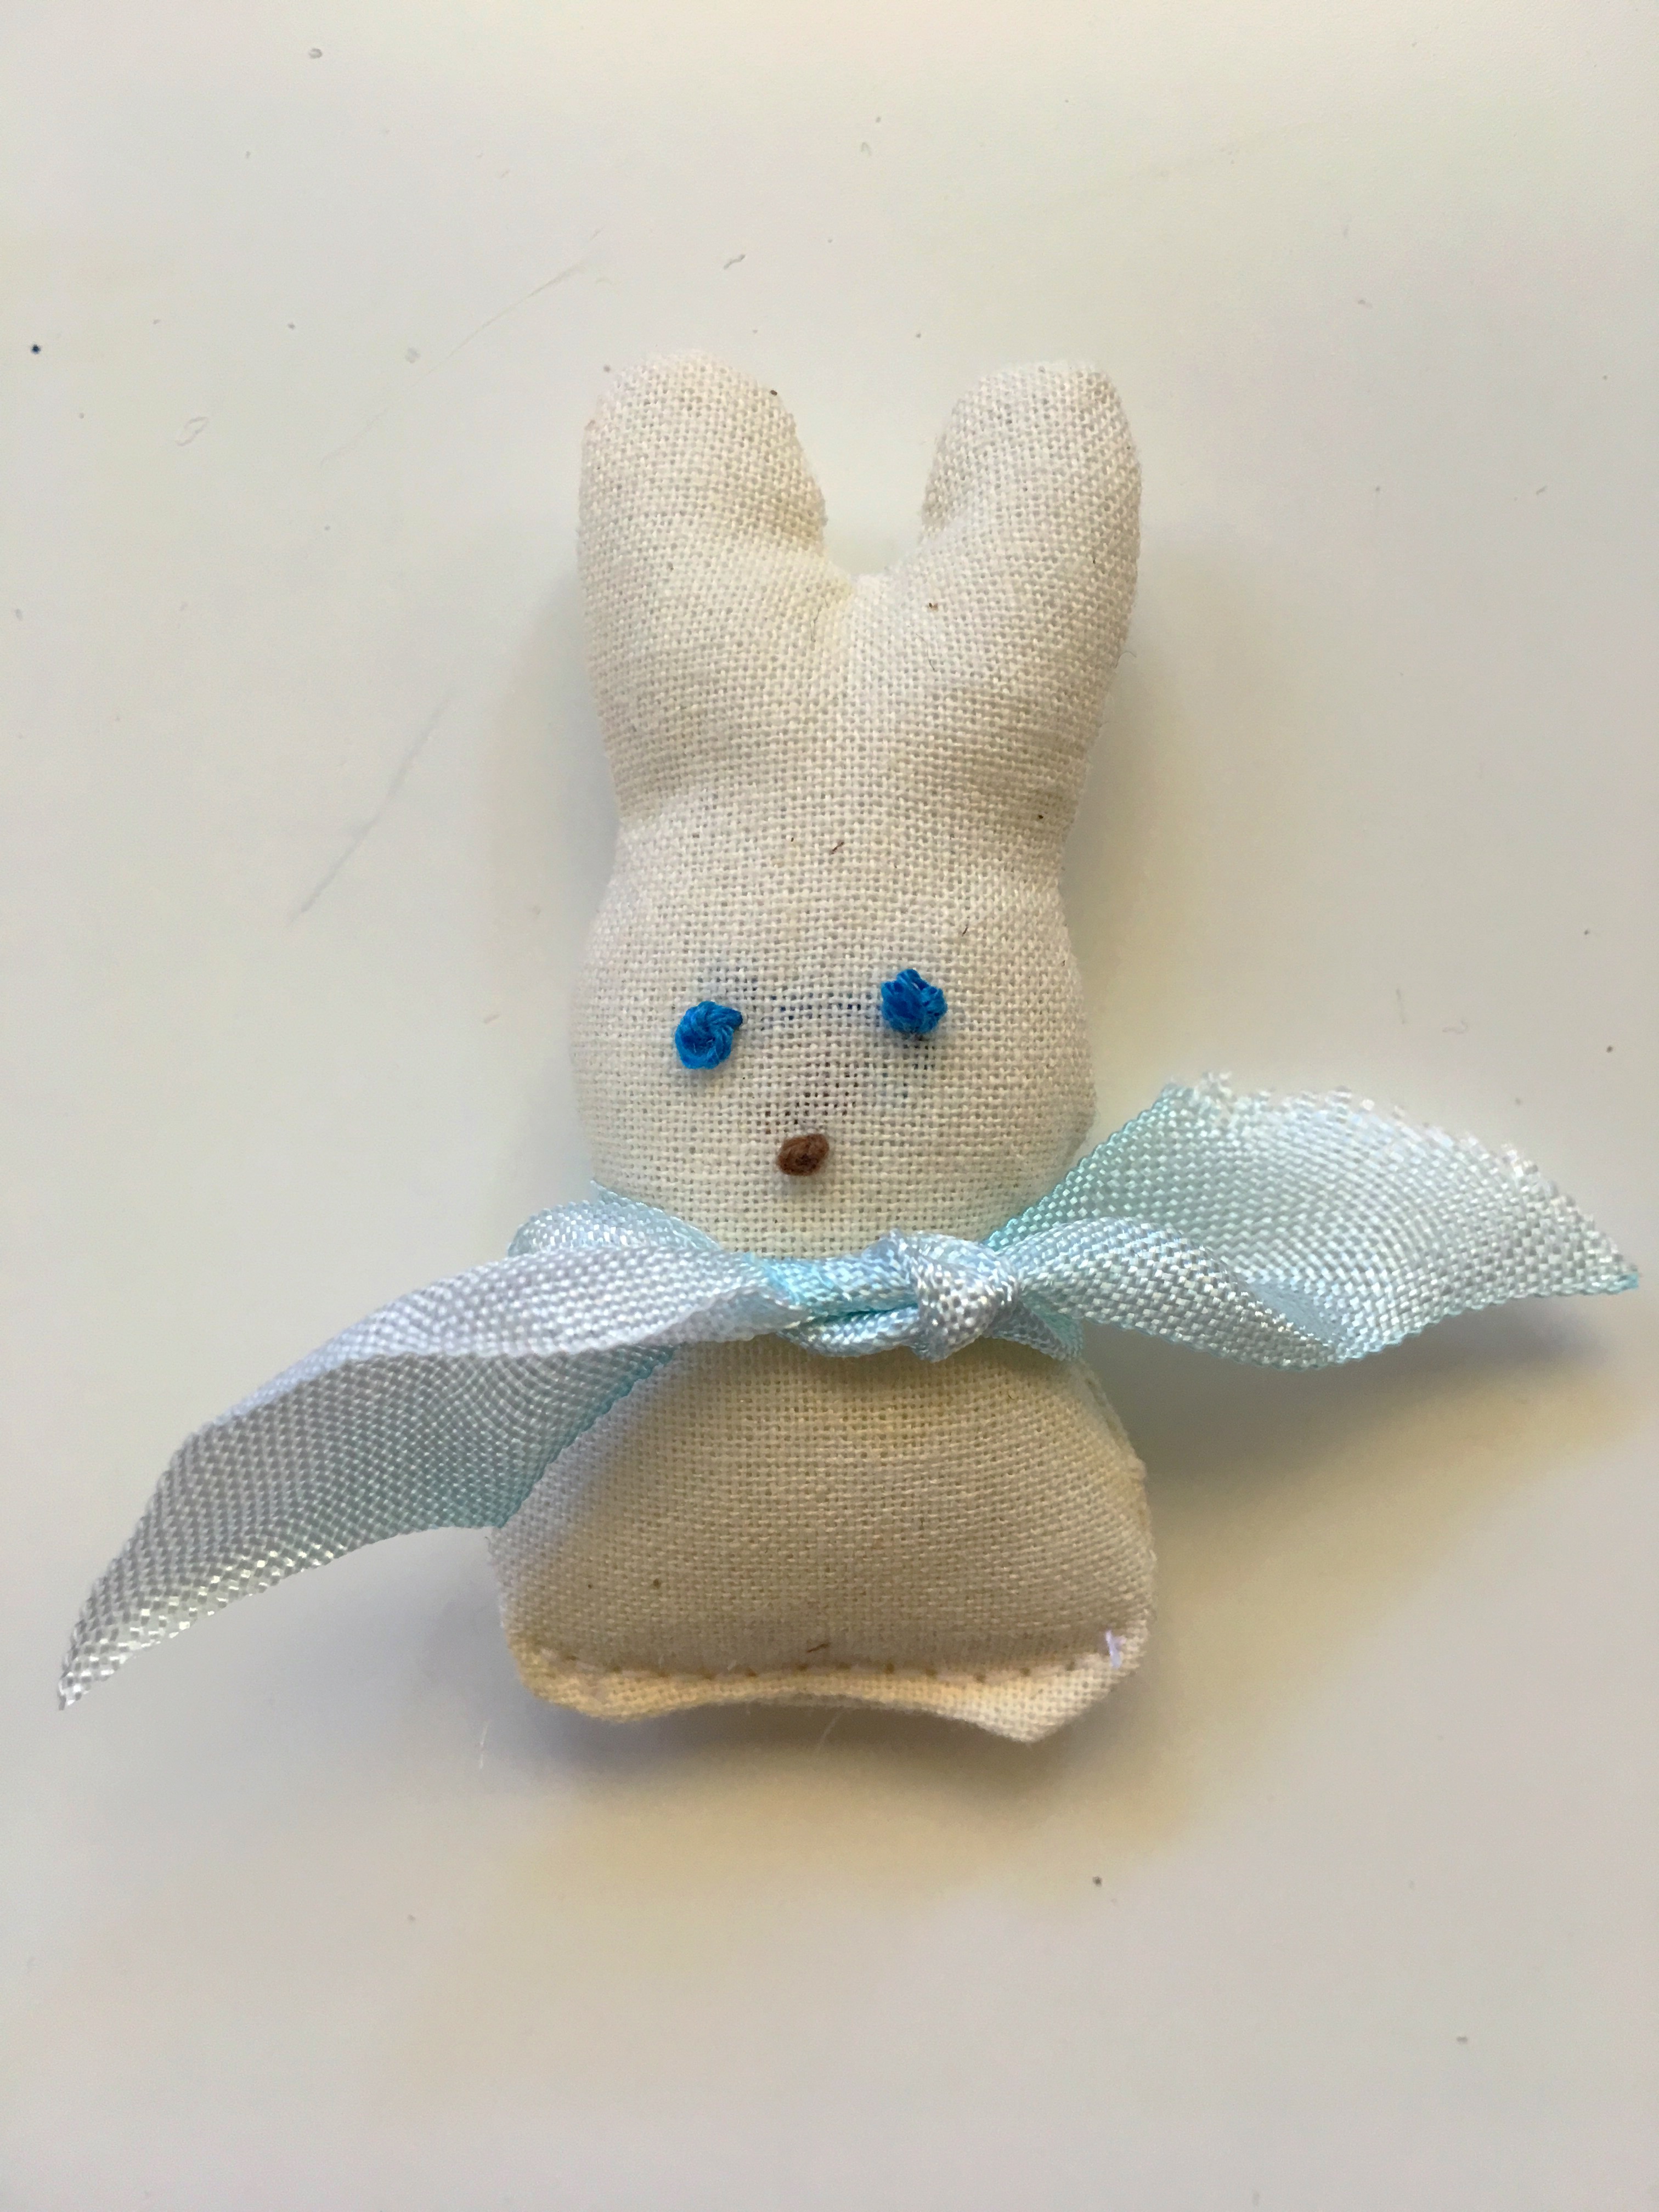
Use left over ribbon or seam binding to decorate bunny’s neck.
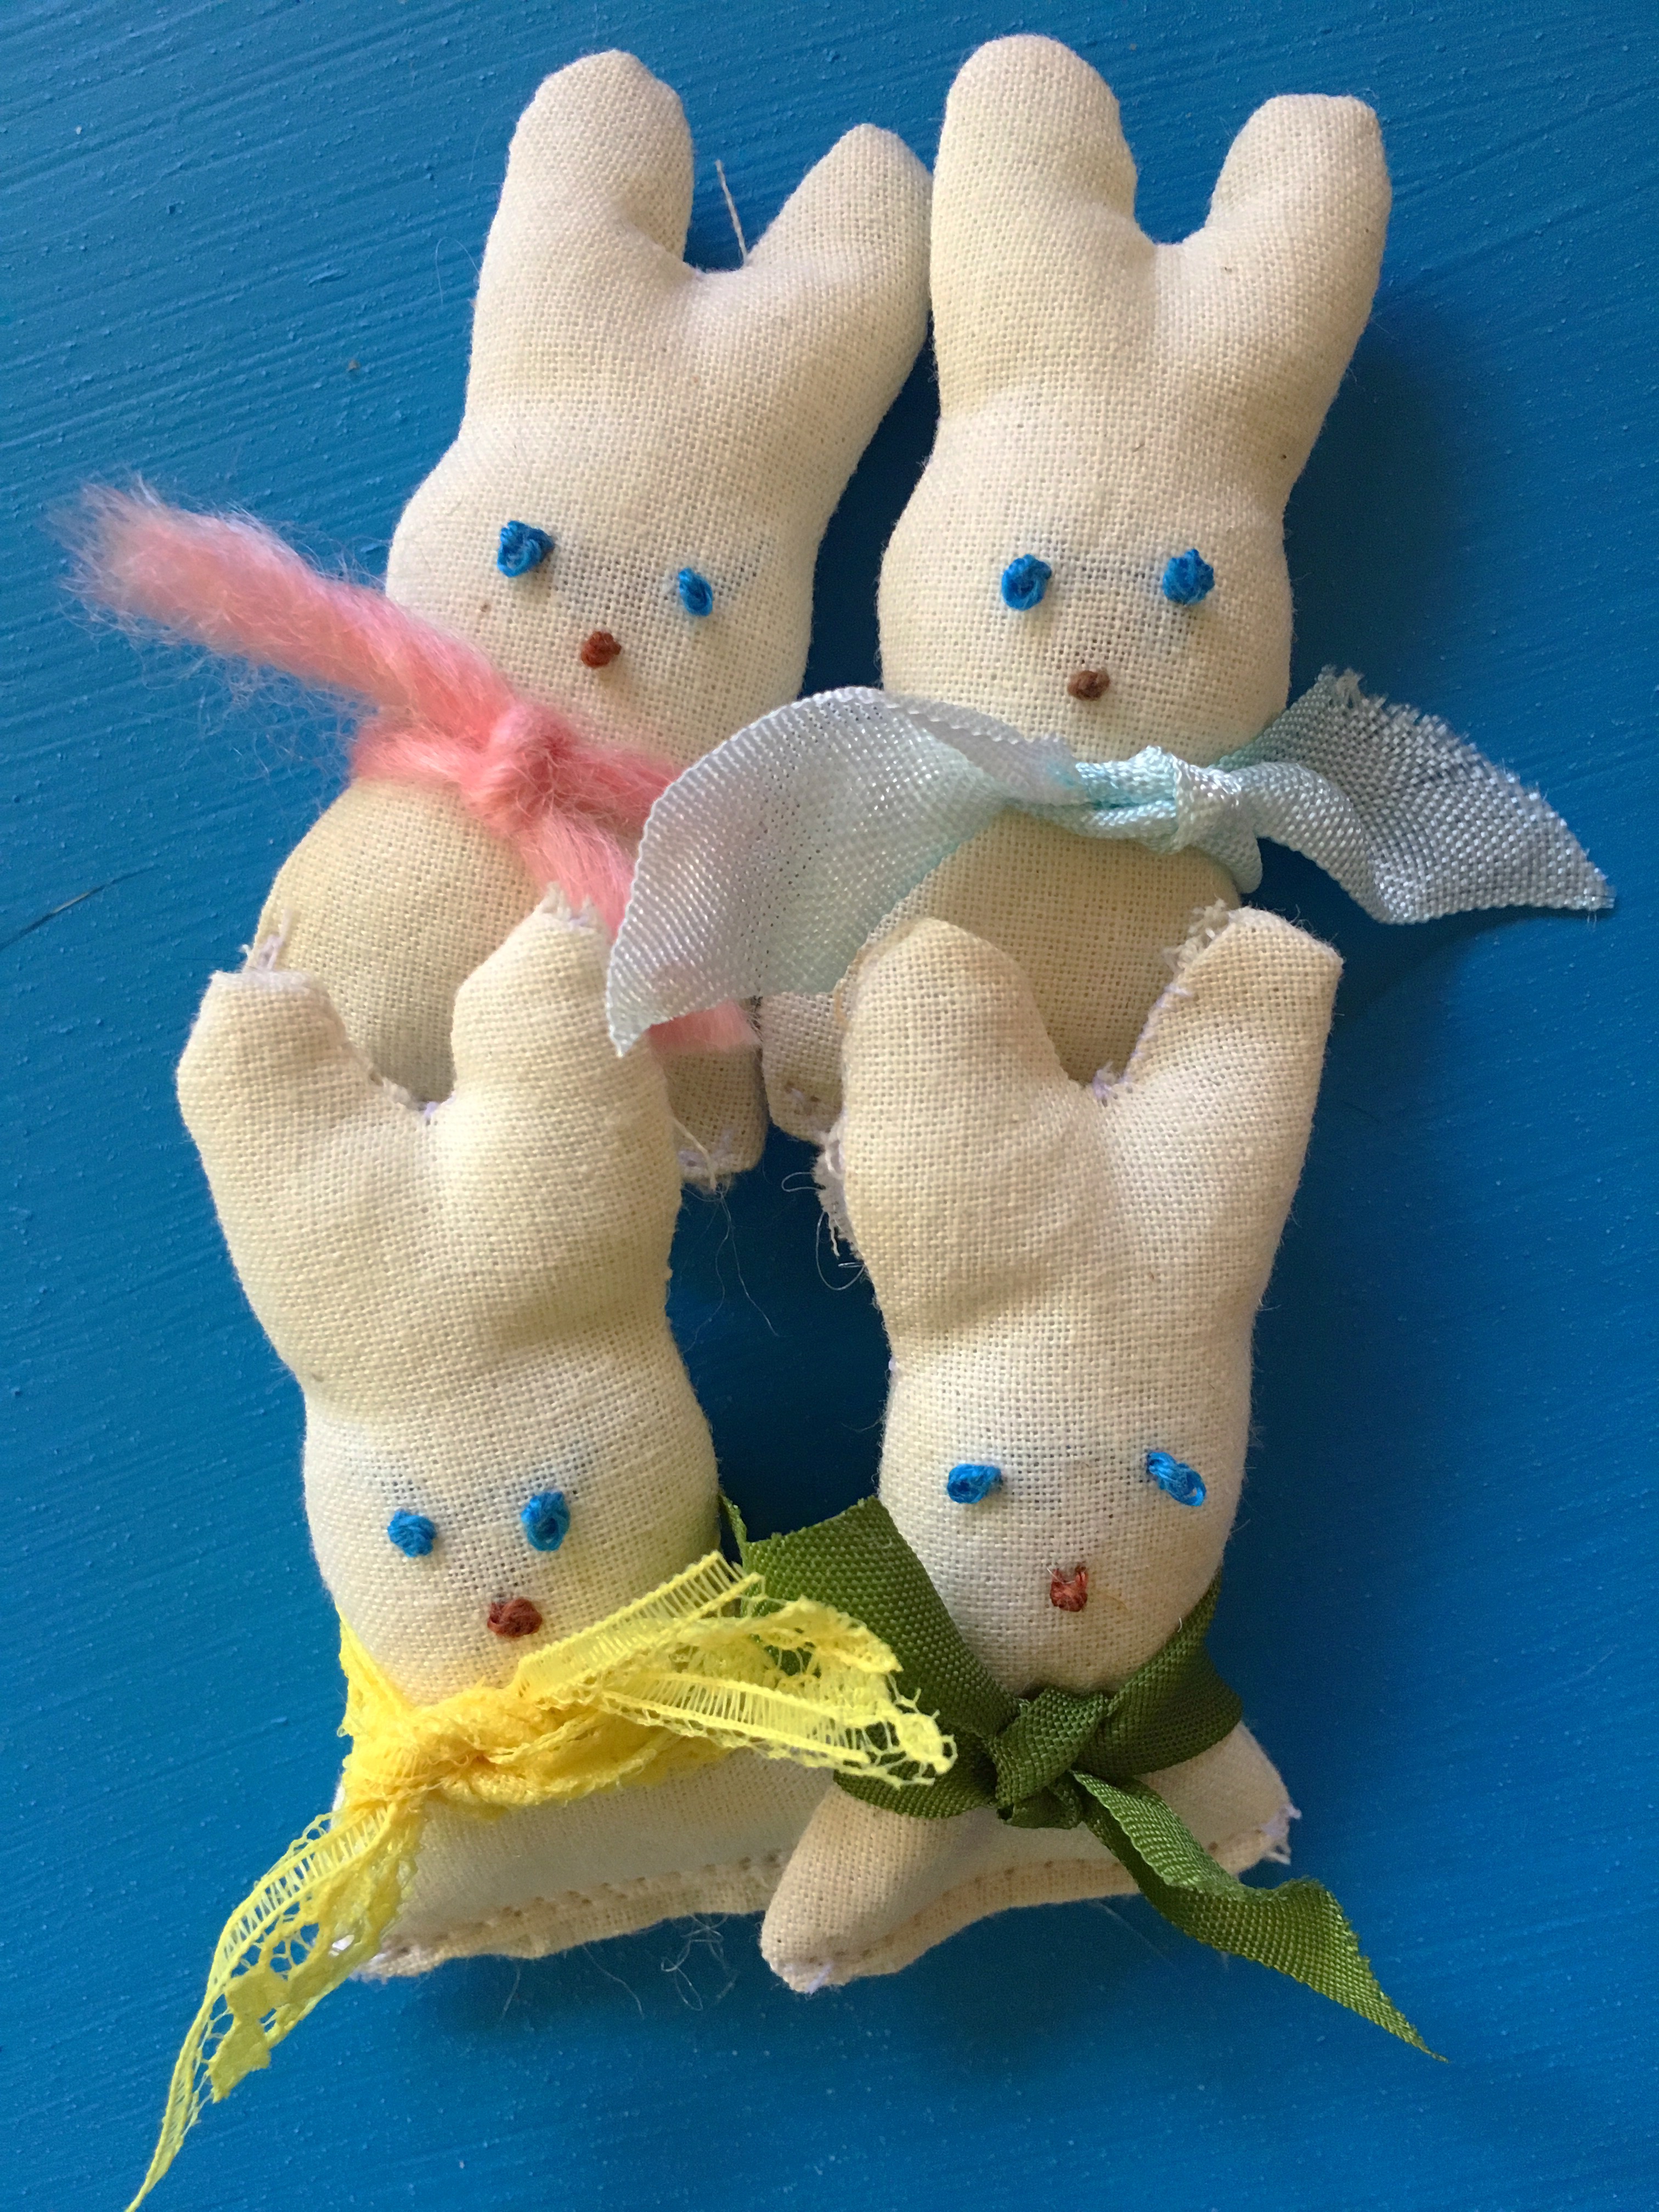
Make a whole family of them!
Enjoy!
xoxo
Vesna

