Today I hired my son to make me some Lego jewelry. We settled for Lego rings.
He loves Legos. No wait, he is addicted to Legos. He is my own Lego Masterbuilder. He’s built me things like mini sewing machine and a coffee maker. Ah and let’s not count the robots, after robots after robots. I need him to build me a functioning robot, one that cleans.
His room is a Lego danger zone. Don’t go in without shoes!! You may come out with a broken leg. If you attempt to clean his room, your hard labor can only be seen for 5 min. Then the sound of spilling out a big bin (or bins) of Legos follows and the shock paralyzes you for a minute.
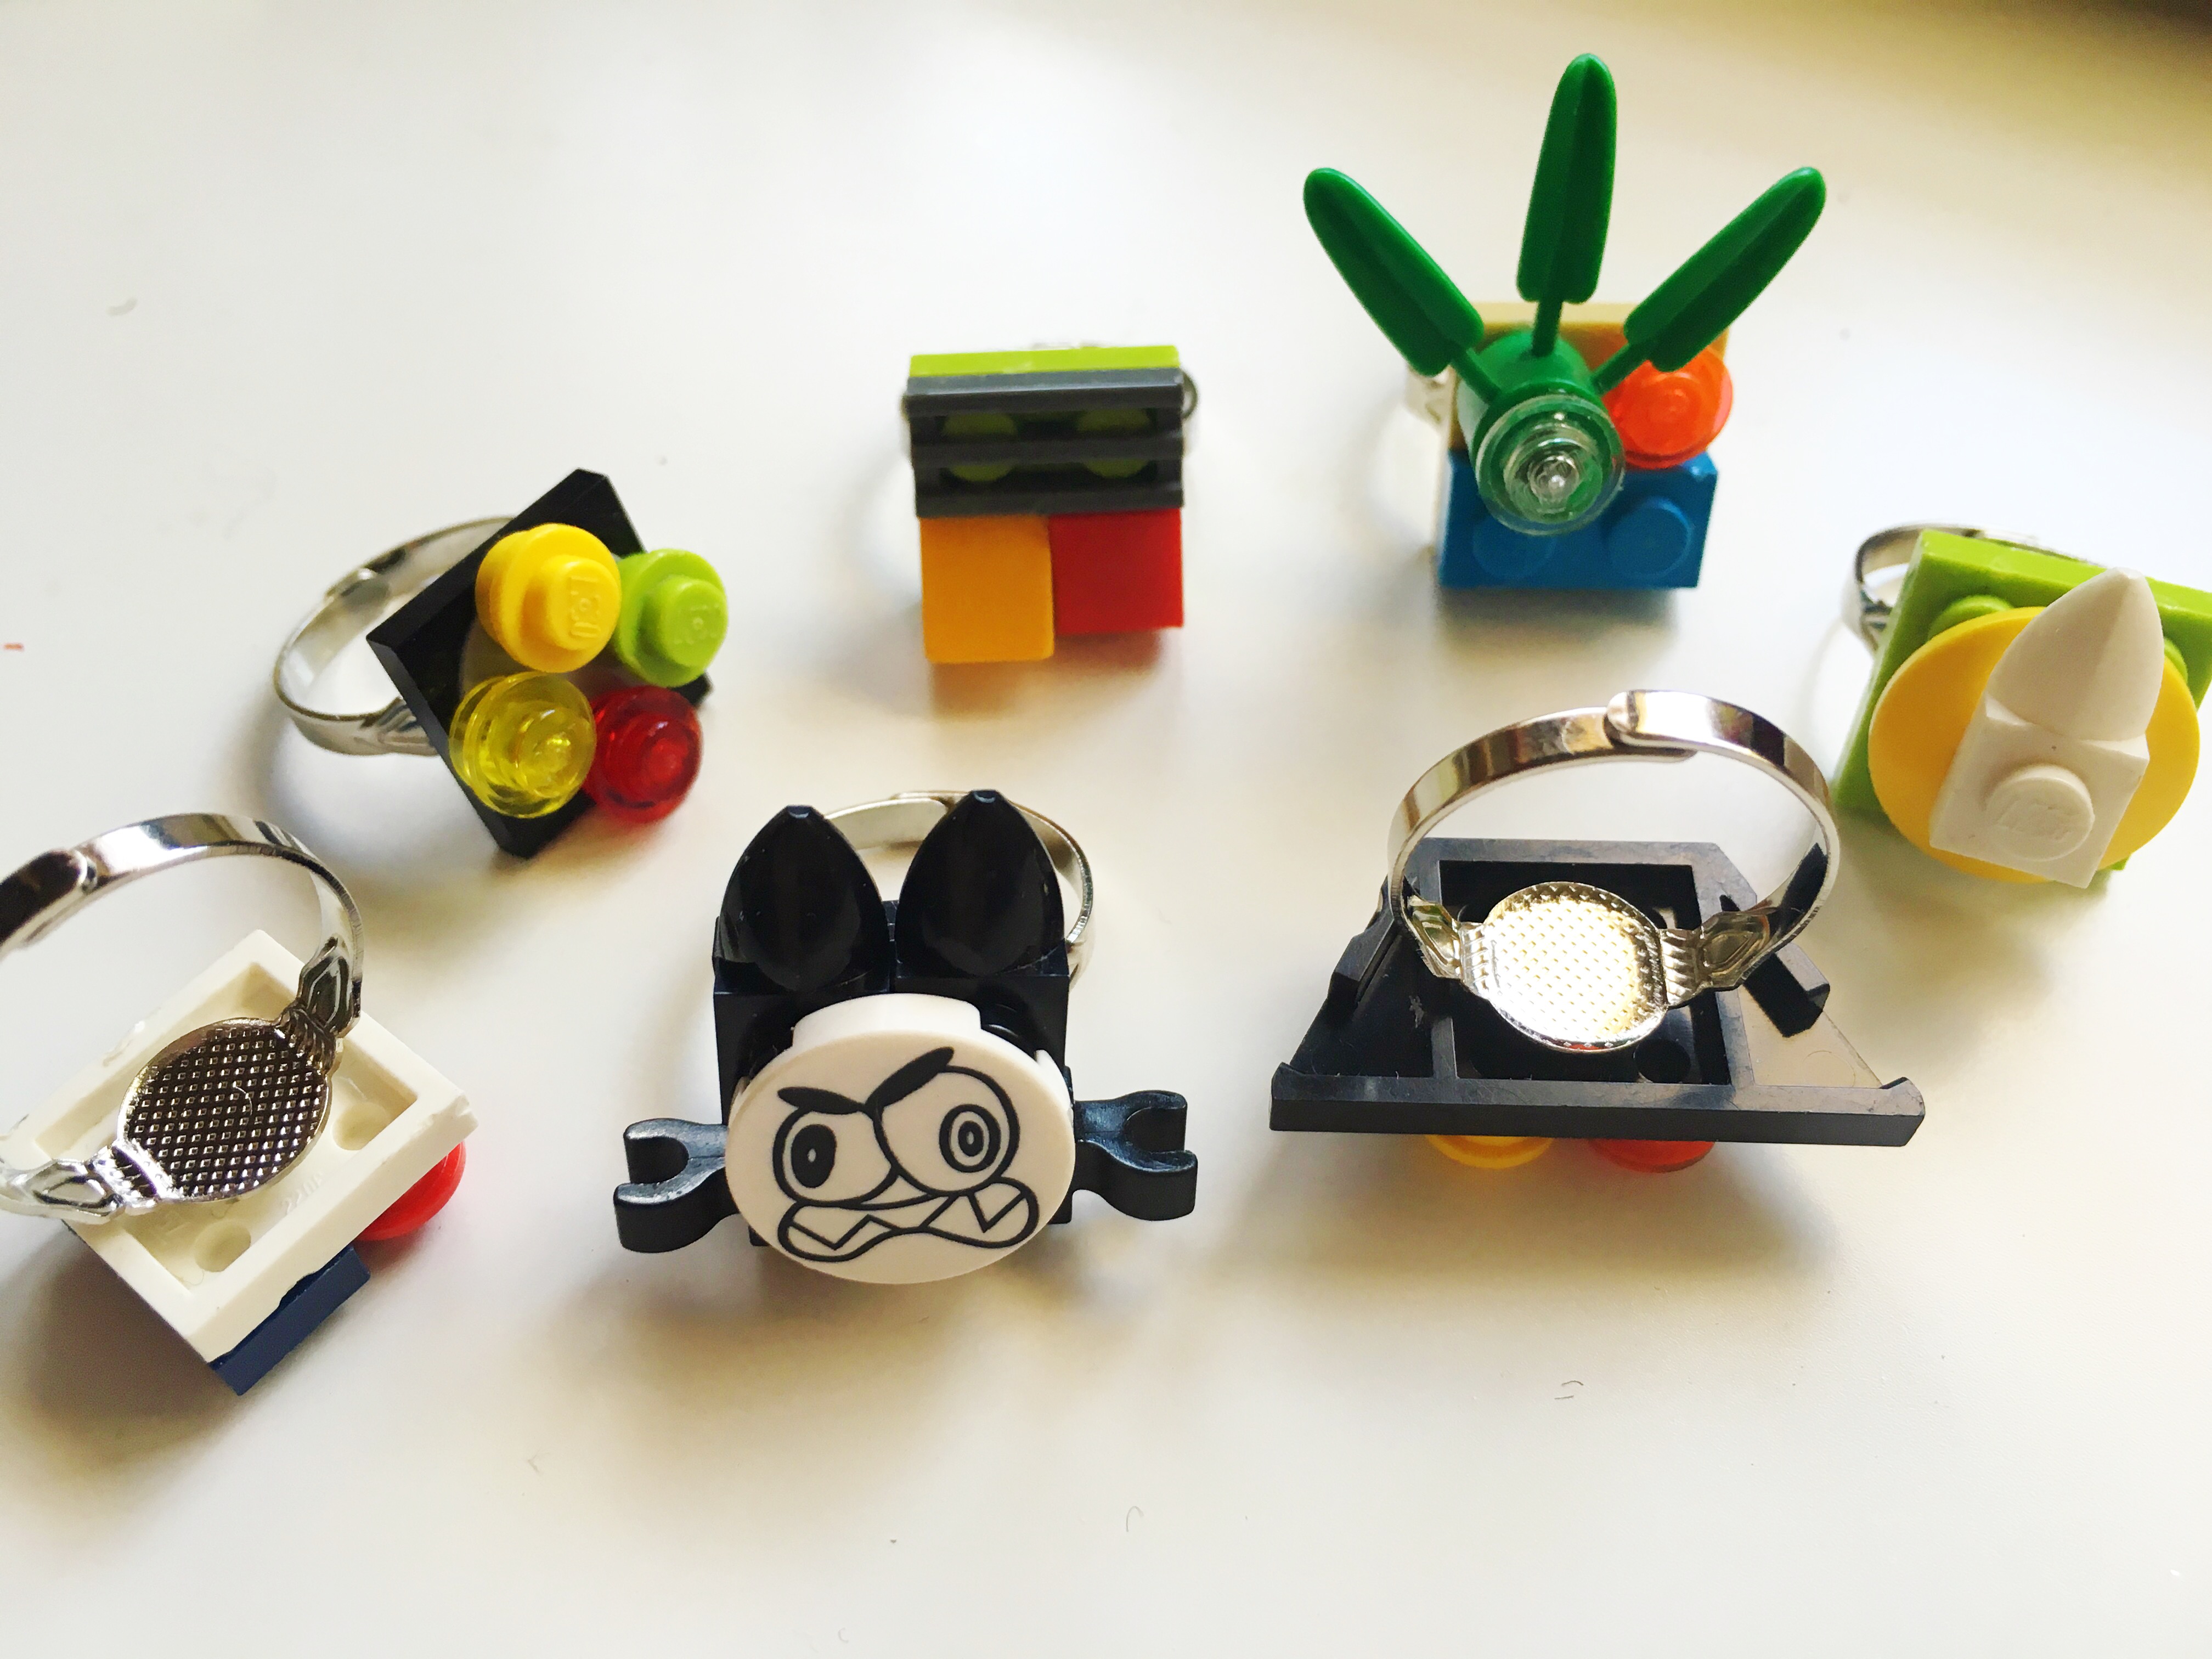
So today in an attempt to lure him away from playing Minecraft, I asked him to build me Lego rings. And these are the results.

Here are some tips you can use if you decide to try to make your own:
1. Sort your bricks by size. 2×2 or 2×3
are good size for rings.
2. Small bricks like 1×1 are great for adding color to your rings. I also used some bamboo leaves and a tooth from a Lego Mixel. If you are feeling uneasy with all this Lego terminology, you are not alone. I had to check with my son, and then I also consulted Lego’s web site.
3. Glue your bricks together with E6000. A dot of glue is enough to hold your pieces together.
4. Use Adjustable ring base and glue it on the back of your brick. Use E6000 for this too.
5. Lego stores have Free Build once a month, where your kids get to make a little Lego project and the bricks for it are free. There are always extra small pieces in these sets and they are ideal for jewelry. If you don’t have kids, this is a great opportunity to help out a parent and give them a break. Your nieces, nephews, your grandkids, your best friend’s kids…..take them, they will thank you.